Hi there everyone!
I have been shooting the night sky for just under a year now and i have recently got auto guiding set up. I was wondering how i can improve my images and what I can do better? Preferably without having to spend thousands of pounds more!! 
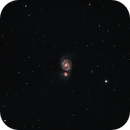
Here is my latest image of M51
https://astrob.in/395128/B/ |
You cannot like this item. Reason: "ANONYMOUS".
You cannot remove your like from this item.
Editing a post is only allowed within 24 hours after creating it.
You cannot Like this post because the topic is closed.
Nothing works better than buying a few good books. It won't cost you a lot.
If you can at least triple the integration of your M51 image and process it properly, it will look very nice.
|
You cannot like this item. Reason: "ANONYMOUS".
You cannot remove your like from this item.
Editing a post is only allowed within 24 hours after creating it.
You cannot Like this post because the topic is closed.
Looking good so far!
A few good resources are “Inside Pixinsight” 2nd Edition. Also lightvortexastronomy.com and jonrista.com are great online resources.
There are a ton of different elements when it comes to imaging, some you can control and some you can’t (seeing, translucency, etc). The obvious things need to be there such as good focus, good guiding, proper exposure time etc. I’ve only been doing this about as long as you, but from my experience nothing can make up for lack of exposure. Stacking more frames is the best way to reduce noise and increase signal. I first started trying to process my images to make up for lack of integration. Put the time in, almost always multiple imaging sessions for an object to get a good result. The processing is trial and error, and those resources above have a ton of information.
Also, a number of objects you’ve shot so far would greatly benefit from either modifying your camera or shooting with a Hydrogen alpha filter.
|
You cannot like this item. Reason: "ANONYMOUS".
You cannot remove your like from this item.
Editing a post is only allowed within 24 hours after creating it.
You cannot Like this post because the topic is closed.
The autoguiding looks great. Here are my recommendations to get more "pop" with the data you already have; over an hour of good data on this target can get great results and although more data will of course help, there are things you can do before that as well.
~ B̶u̶m̶p̶ ̶u̶p̶ ̶y̶o̶u̶r̶ ̶I̶S̶O̶ ̶s̶u̶b̶s̶t̶a̶n̶t̶i̶a̶l̶l̶y̶.̶ ̶G̶r̶a̶n̶t̶e̶d̶ ̶I̶ ̶w̶a̶s̶ ̶a̶t̶ ̶a̶ ̶f̶a̶i̶r̶l̶y̶ ̶d̶a̶r̶k̶ ̶s̶i̶t̶e̶,̶ ̶b̶u̶t̶ ̶I̶ ̶i̶m̶a̶g̶e̶d̶ ̶a̶t̶ ̶I̶S̶O̶ ̶1̶2̶8̶0̶0̶ ̶f̶o̶r̶ ̶t̶h̶i̶s̶ ̶t̶a̶r̶g̶e̶t̶ ̶(̶s̶u̶b̶s̶ ̶o̶v̶e̶r̶ ̶6̶0̶s̶ ̶e̶a̶c̶h̶)̶ ̶w̶i̶t̶h̶o̶u̶t̶ ̶s̶a̶t̶u̶r̶a̶t̶i̶n̶g̶ ̶a̶n̶y̶t̶h̶i̶n̶g̶.̶ ̶M̶a̶k̶e̶ ̶s̶u̶r̶e̶ ̶n̶o̶ ̶s̶t̶a̶r̶s̶ ̶a̶r̶e̶ ̶b̶l̶o̶w̶n̶ ̶o̶u̶t̶ ̶(̶l̶o̶a̶d̶ ̶a̶ ̶r̶a̶w̶ ̶f̶i̶l̶e̶ ̶i̶n̶t̶o̶ ̶a̶ ̶p̶r̶o̶g̶r̶a̶m̶ ̶a̶n̶d̶ ̶c̶h̶e̶c̶k̶ ̶t̶h̶e̶ ̶p̶i̶x̶e̶l̶ ̶v̶a̶l̶u̶e̶s̶ ̶a̶c̶r̶o̶s̶s̶ ̶t̶h̶e̶ ̶b̶r̶i̶g̶h̶t̶e̶s̶t̶ ̶s̶t̶a̶r̶)̶,̶ ̶b̶u̶t̶ ̶g̶o̶ ̶a̶s̶ ̶h̶i̶g̶h̶ ̶a̶s̶ ̶y̶o̶u̶ ̶c̶a̶n̶ ̶w̶i̶t̶h̶ ̶t̶h̶e̶ ̶I̶S̶O̶ ̶v̶a̶l̶u̶e̶.̶ Not only will you pick out the details with more "brightness resolution", but you'll actually reduce noise. Yes, I know in daytime photography we think of that as increasing noise, but that's only because the exposure time subsequently goes down when increasing the ISO, and that is what increases noise. T̶h̶e̶ ̶r̶u̶l̶e̶ ̶i̶s̶ ̶u̶s̶e̶ ̶t̶h̶e̶ ̶h̶i̶g̶h̶e̶s̶t̶ ̶I̶S̶O̶ ̶y̶o̶u̶ ̶c̶a̶n̶ ̶a̶t̶ ̶a̶ ̶g̶i̶v̶e̶n̶ ̶e̶x̶p̶o̶s̶u̶r̶e̶ ̶w̶i̶t̶h̶o̶u̶t̶ ̶s̶a̶t̶u̶r̶a̶t̶i̶n̶g̶ ̶a̶n̶y̶t̶h̶i̶n̶g̶.̶ EDIT: Bump it up until you pass the downstream noise threshold (see below).
~ You will need masks to get what you have to pop more. Check out the lightvortexastronomy tutorial on making brightness and star masks, because when you mask everything but the galaxy and bump up the brightness, it will pop right out without ruining your background. You can also reduce background noise with such masks.
~ You have a lot of great color data in the galaxy; bump up that saturation! While masking the background, of course.
~ Don't raise the black point too high so your background isn't clipped.
These are mostly processing things (the masks are the single most important), but you have some great data to work with (4 minute subs can get you a lot). See how much you can get out of it. Good luck!
|
You cannot like this item. Reason: "ANONYMOUS".
You cannot remove your like from this item.
Editing a post is only allowed within 24 hours after creating it.
You cannot Like this post because the topic is closed.
|
Join your local astronomy club/society’s astrophotography section. Most folks are willing to help share their hands on experience & knowledge 😊
|
You cannot like this item. Reason: "ANONYMOUS".
You cannot remove your like from this item.
Editing a post is only allowed within 24 hours after creating it.
You cannot Like this post because the topic is closed.
|
Anyone can recommend books for intermediate or advance astrophotography processing?
|
You cannot like this item. Reason: "ANONYMOUS".
You cannot remove your like from this item.
Editing a post is only allowed within 24 hours after creating it.
You cannot Like this post because the topic is closed.
SJ Richard:
Anyone can recommend books for intermediate or advance astrophotography processing?
https://www.springer.com/br/book/9783319976884 |
You cannot like this item. Reason: "ANONYMOUS".
You cannot remove your like from this item.
Editing a post is only allowed within 24 hours after creating it.
You cannot Like this post because the topic is closed.
Michael:
what I can do better?
A nice 1st result.....
You need more exposure time per frame. Have a look to the histogram at your cameradispaly: The Peak (represent the Background) should come clear from the dark end. Around 25-50%.
At my Sky I use normaly here at my F4 Scope 240 seconds at ISO800.
Siegfried
|
You cannot like this item. Reason: "ANONYMOUS".
You cannot remove your like from this item.
Editing a post is only allowed within 24 hours after creating it.
You cannot Like this post because the topic is closed.
A few good resources are “Inside Pixinsight” 2nd Edition. Also lightvortexastronomy.com and jonrista.com
I had a look at these and thanks for the advice! Very useful information! looks like i need to really dive in to Pixinsight it seems very technical!
Siegfried:
Michael:
what I can do better? A nice 1st result.....
You need more exposure time per frame. Have a look to the histogram at your cameradispaly: The Peak (represent the Background) should come clear from the dark end. Around 25-50%.
At my Sky I use normaly here at my F4 Scope 240 seconds at ISO800.
Siegfried
Oh okay! I'll try uping my ISO to start!
Just need a clear night now!! Non stop cloud, wind, and rain at the moment!
|
You cannot like this item. Reason: "ANONYMOUS".
You cannot remove your like from this item.
Editing a post is only allowed within 24 hours after creating it.
You cannot Like this post because the topic is closed.
While increasing the ISO seems like an intuitive thing to do, it may actually be counterproductive due to the 2 sources of noise in DSLRs.
I see you’re using a Nikon D7000. I’m a Nikon user as well, and I found this advice very helpful http://dslr-astrophotography.com/iso-values-nikon-cameras/
A higher ISO doesn’t increase sensitivity, it simply multiplies the numbers in the data, including the noise.
Most Nikons actually perform better than Canons at lower ISO with regard to upstream vs downstream noise.
Use a multiple of a base ISO 100, 200, 400, etc to avoid quantisation error as well. I use 200 on my D750.
As others have said, you basically need to capture more photons, and improve your s/n ratio, and that means longer exposures. A higher ISO won’t make any difference to that, and may harm your dynamic range.
But well done on some great early results, it took me a long time to start achieving anything like that.
|
You cannot like this item. Reason: "ANONYMOUS".
You cannot remove your like from this item.
Editing a post is only allowed within 24 hours after creating it.
You cannot Like this post because the topic is closed.
Welcome fellow DSLR shooter. I have been at this for just under a year as well. I use a Canon DSLR and have been autoguiding since day 1, but did benchmark my mount unguided, because......well......stuff fails and if I loose the autoguider for any reason I needed to know the limitations of the mounts guiding/drift.
I think your image looks great.
From my experience thus far, here are my recommendations:
1 - Dail in that polar alignment procedure (if you haven't). The better you are polar aligned, the longer you can expose.
2 - Test for your "optimal" ISO (more on that below) and use that or a lesser setting.
3 - More data, more data, more data and even more data.
4 - Processing, learn the tools available and try different settings for different targets (no one size fits all).
As others have said, ISO does not increase sensitivity of the sensor, it "boosts" the values for each pixel. As a result, noise is boosted as well. Take a series of test "DARKS" at each ISO using the same exposure length. Pull them into APP, Lightroom, Photoshop, whatever you want to use that displays the Histogram. The Histogram should be all the way to the left, but at some point it will start creeping to the right. For me that is when I go from 400 to 800 ISO, it is a small creep. The significant creep comes between 800 & 1600. So for me, I shoot at ISO 800.
For exposure length, that is a tougher one. Each imaging train is different. For me I use 3 basic exposure lengths for individual frames. 60 sec for star Clusters (reduced risk of blowing out the stars), 120 sec for Galaxies (helps bring out structure but can blow out the stars) and 300 sec for Nebula (definitely blows out the stars but gets some fainter detail). I rarely go above 300 sec.
Total exposure time, well, that is another hard one to determine. For me, I go after 8 hours worth of data. Not really needed for star clusters, but for galaxies and brighter nebula, this seems to give good detail.
It's all about the SNR, getting the most photons into the wells while reducing the unwanted noise.
Note: Yep, I have no images posted on Astrobin yet. I have been learning and relearning PixInsight and have recently started manually integrating the sub frames. So I don't have any that I feel are "post worthy" just yet. Hopefully in a couple weeks.
|
You cannot like this item. Reason: "ANONYMOUS".
You cannot remove your like from this item.
Editing a post is only allowed within 24 hours after creating it.
You cannot Like this post because the topic is closed.
While increasing the ISO seems like an intuitive thing to do, it may actually be counterproductive due to the 2 sources of noise in DSLRs.I see you’re using a Nikon D7000. I’m a Nikon user as well, and I found this advice very helpful http://dslr-astrophotography.com/iso-values-nikon-cameras/
It's interesting, I had a long response ready to go a few days ago about the fact that the noise that gets "overwhelmed" by increasing the ISO value is noise that occurs after the amplification (we agree that digital ISO is just a multiplier), but I went more in-depth with this article (it's my 3rd time or so coming across this study) and I assume you already are aware of all of this.
Although I find it hard to believe that ISO values as low as 100 overwhelm the internal noise, I think the biggest issue is individual cameras being different than what was tested in this article and having their own variances.
What I'm really left wondering, and what I'm hoping someone else can shed some light on, is how does increasing the ISO decrease dynamic range if nothing is overexposed beforehand or afterwards? If I have a histogram that occurs towards the left at a certain exposure and I take another image at a higher ISO value, how does this constitute a loss in dynamic range? As long as the second image doesn't have any pixels at the far right of the histogram, doesn't this actually spread the data over a more spread-out distribution, leading to more dynamic range? Your highest pixel value is now even higher and the black point probably didn't change.
|
You cannot like this item. Reason: "ANONYMOUS".
You cannot remove your like from this item.
Editing a post is only allowed within 24 hours after creating it.
You cannot Like this post because the topic is closed.
Alright I went through a painful exploration on the things above about ISO and dynamic range, so I want to answer the questions I posed above and leave it at that since it's slightly tangential to the original topic, but I still don't want to leave the details unaddressed for future readers of this thread.
My main questions on my reply directly above were because we didn't distinguish between sensor DR and image DR. Sure, if your image didn't have any clipping on the top end at a certain ISO, and bumping it up still left no clipping, then the image dynamic range didn't decrease. But your capacity to measure higher photons with distinction did (the sensor's capacity). However, it's rare in practice to have no clipping in the brighter stars upon doing this, so to give the best results in all general cases, one should increase the ISO past the downstream noise levels and go no farther, which is determined by the individual camera's "sensor dynamic range" vs. "ISO" graph (see the link that was posted above).
Although in theory you wouldn't lose image dynamic range by increasing the ISO if absolutely nothing became clipped, it's probably not worth the risk and the benefits are fairly small at that point once the downstream noise has been overwhelmed by the signal.
As it pertains to OP, ISO500 is well above his camera's "ISOless" value (although many need 800 or 1600, the D7000 is exceptionally low on noise- see link above) so he probably would get no benefit by increasing it farther unless the histogram still doesn't have any white pixels after doing so, which is hardly worth the risk.
Number one benefit is to use careful masks to pull detail out. Keep it up! |
You cannot like this item. Reason: "ANONYMOUS".
You cannot remove your like from this item.
Editing a post is only allowed within 24 hours after creating it.
You cannot Like this post because the topic is closed.
Thanks all for the amazing advice! I went back out and got me data for the object. For ease of stacking i left the ISO the same this time (ill change it for the next object) but i did up the over all time to 360s subs. It's now up to just over 4 hours of data. the one thing i noticed was that mine seems to come out very red compared to all the others i see. All I've done is boost the saturation. Why is this? I've liked my work in progress bellow. I still needs to be drizzeled but i thought i would put it up in the staging area so you can see what i mean!
 |
You cannot like this item. Reason: "ANONYMOUS".
You cannot remove your like from this item.
Editing a post is only allowed within 24 hours after creating it.
You cannot Like this post because the topic is closed.
PixInsight is awesome for processing and the book "Inside PixInsight" is excellent, but you might want to get started with some free video tutorials on the web.
There are a number of "end to end" video tutorials out there for beginners. For example, "Preparing your first image processing with PixInsight" which deals with using PixInsight with the DSLR, which is what you are using.
Then watch his second video, "Full OSC workflow with PixInsight" which just so happens to do end to end processing of a DSLR photo series of guess what? M51... right up your alley!
|
You cannot like this item. Reason: "ANONYMOUS".
You cannot remove your like from this item.
Editing a post is only allowed within 24 hours after creating it.
You cannot Like this post because the topic is closed.
Although in theory you wouldn't lose image dynamic range by increasing the ISO if absolutely nothing became clipped, it's probably not worth the risk and the benefits are fairly small at that point once the downstream noise has been overwhelmed by the signal.
Others on this site have way more experience than myself, so I offer just my own naive view. 
Astrophotography images do tend to have a large standard deviation. Stars can saturate a pixel quickly, whereas background almost never does (unless you are shooting broadband from a city location, and then you have no choice but to shorten exposures).
So you will always get some clipping on the stars. But the brighter stars will be noticeably smaller when the dynamic range is larger since the clipping happens nearest the middle of the star first.
Using a lower ISO should slow down this effect, giving you tighter stars. And carefully applying curves in post-processing can then bring out the low-end detail without bloating stars.
One further thought on this. Because a very small % of the pixels in most images are stars, a standard linear histogram doesn't really convey how much star saturation is present. I wonder if others have suggestions of a better way to measure this?
|
You cannot like this item. Reason: "ANONYMOUS".
You cannot remove your like from this item.
Editing a post is only allowed within 24 hours after creating it.
You cannot Like this post because the topic is closed.
Alex:
Others on this site have way more experience than myself, so I offer just my own naive view. smile
No but I think you're right, if in theory you never clipped anything, you wouldn't have a reduction in image dynamic range. However, stars are almost always clipped to some extent and that's why speaking about the sensor dynamic range is relevant here. I've actually found, after a review of my previous images, that my stars were more clipped than I gave it credit for at these high ISO values. I'll be revamping my ISO value strategy to much lower values, however one annoying problem is that my RAW image viewer hardly shows anything on the preview, making it hard to assess if they're in focus and centered!
Alex:
One further thought on this. Because a very small % of the pixels in most images are stars, a standard linear histogram doesn't really convey how much star saturation is present. I wonder if others have suggestions of a better way to measure this?
Yes, the DSLR histogram, even viewed on a computer, hardly shows this. If you have pixinsight, I recommend loading one RAW file (don't even need debayering), and hover over a star (after using the STF) using the readout tool. Is the K value "stuck" at a value (even if it's not 1.0) throughout that star? This is saturation.
|
You cannot like this item. Reason: "ANONYMOUS".
You cannot remove your like from this item.
Editing a post is only allowed within 24 hours after creating it.
You cannot Like this post because the topic is closed.
and hover over a star (after using the STF) using the readout tool. Is the K value "stuck" at a value (even if it's not 1.0) throughout that star? This is saturation.
At 16 bit the saturation at PI = 1
14 Bit = 0,25 (16bit/2=15bit /2=14)
at 12bit Resolution the saturation value will be 0,0625.
Siegfried
|
You cannot like this item. Reason: "ANONYMOUS".
You cannot remove your like from this item.
Editing a post is only allowed within 24 hours after creating it.
You cannot Like this post because the topic is closed.
Siegfried:
At 16 bit the saturation at PI = 114 Bit = 0,25 (16bit/2=15bit /2=14)
at 12bit Resolution the saturation value will be 0,0625.
Sorry, I was posing a question rhetorically to someone who is performing this process, as in "does it show up this way? Then you are saturated", not asking myself. I agree with your response entirely, this is good information; lower bit values saturate at values below 1.0, unless you change the readout mode to accommodate your bit value. Clear skies!
Alex
|
You cannot like this item. Reason: "ANONYMOUS".
You cannot remove your like from this item.
Editing a post is only allowed within 24 hours after creating it.
You cannot Like this post because the topic is closed.
|
I think the best way to improve is to take a close look at each image you produce and identify an aspect or multiple aspects where you thought you came up short. Browse other versions of the target that you like and ask yourself 'how do I get from here to there?' And don't hesitate to reach out to other imagers to ask them about specific aspects of their images and how they were able to achieve them.
|
You cannot like this item. Reason: "ANONYMOUS".
You cannot remove your like from this item.
Editing a post is only allowed within 24 hours after creating it.
You cannot Like this post because the topic is closed.
|
Hi Michael, to improve your skills the time is very important... one year in astrophotography is like one month as a new driver fell on the street ... so you need to setup your gear approximately 50 times at least or spend spend 50 nights shooting the objects to get knowledge what exactly going on with your guiding and stuff .... Then another 50 days of postprocessing that became 100 days experience ... after that you will have 50% less questions" why "good luck... cheers
|
You cannot like this item. Reason: "ANONYMOUS".
You cannot remove your like from this item.
Editing a post is only allowed within 24 hours after creating it.
You cannot Like this post because the topic is closed.
Thinking outside the box here, one of the best ways I was able to improve, is sitting on my data for a long time. Whenever I collect, I'm never in a rush to get it out for people to see it. My last two projects, I sat on the data for two months each. Occasionally I'd do a process on it, and then sit on that process for a few days, then come back and look at it, all in an effort to evaluate my own work without any form of "completion bias" (where one may have a false sense of accomplishment, just because something is "done"). Now, two months may be a long time, I actually forgot I had Witch Head data sitting around for a little while, but definitely sitting on your data for at least a week or so, I think is a good thing.
I'd also suggest, if you're not already doing it, limiting the audience of rough drafts. The purpose of a rough draft, is to critically evaluate one's work, and look for any way to improve. Often, when rough drafts are released, en masse, to the internet, one can get a false sense of accomplishment/completion from them (people on FB will "like" anything), which defeats the purpose of rough drafts. I give my rough drafts to two or three folks who are at/past my current skill level, so that they can give me the constructive feedback I am missing in my own evaluations of my work.
|
You cannot like this item. Reason: "ANONYMOUS".
You cannot remove your like from this item.
Editing a post is only allowed within 24 hours after creating it.
You cannot Like this post because the topic is closed.
James Newman:
Thinking outside the box here, one of the best ways I was able to improve, is sitting on my data for a long time. Whenever I collect, I'm never in a rush to get it out for people to see it. My last two projects, I sat on the data for two months each. Occasionally I'd do a process on it, and then sit on that process for a few days, then come back and look at it, all in an effort to evaluate my own work without any form of "completion bias" (where one may have a false sense of accomplishment, just because something is "done" . Now, two months may be a long time, I actually forgot I had Witch Head data sitting around for a little while, but definitely sitting on your data for at least a week or so, I think is a good thing. . Now, two months may be a long time, I actually forgot I had Witch Head data sitting around for a little while, but definitely sitting on your data for at least a week or so, I think is a good thing.
I'd also suggest, if you're not already doing it, limiting the audience of rough drafts. The purpose of a rough draft, is to critically evaluate one's work, and look for any way to improve. Often, when rough drafts are released, en masse, to the internet, one can get a false sense of accomplishment/completion from them (people on FB will "like" anything), which defeats the purpose of rough drafts. I give my rough drafts to two or three folks who are at/past my current skill level, so that they can give me the constructive feedback I am missing in my own evaluations of my work.
This is great advice.
I also believe that a good book will help. For sure there are a lot of good tutorials online, but unfortunately they don't fit everyone's skill level and needs, or they are not correct (I am sorry to say that).
My advice is to try to work one target at a time for a long time, collect as much data you can, and try to follow a very simple processing workflow. In the beginning, just forget about drizzle and deconvolution, or even noise reduction. With a good amount of data, one other benefit is that you will have the freedom to toss some bad frames which will create problems later at the processing stage.
|
You cannot like this item. Reason: "ANONYMOUS".
You cannot remove your like from this item.
Editing a post is only allowed within 24 hours after creating it.
You cannot Like this post because the topic is closed.
to create to post a reply.


