Pimp your simple laser collimator for higher resolution Generic equipment discussions · Pinguru · ... · 1 · 90 · 6

Pinguru 8.73
...
· 
·  1 like
I am using a cheap 25€ laser collimator from Amazon. It has a more or less round laser spot, adjustable brightness and adjustment screws for alignment. However, the hole in the 45° target plane is very large. So adjusting the reflected beam into the middle “where you can’t see it anymore” is not really good enough for me. There is plenty of misalignment possible within the resolution of the stock laser.

A picture of the Baader Laser Colli MK3 brought me to an idea:
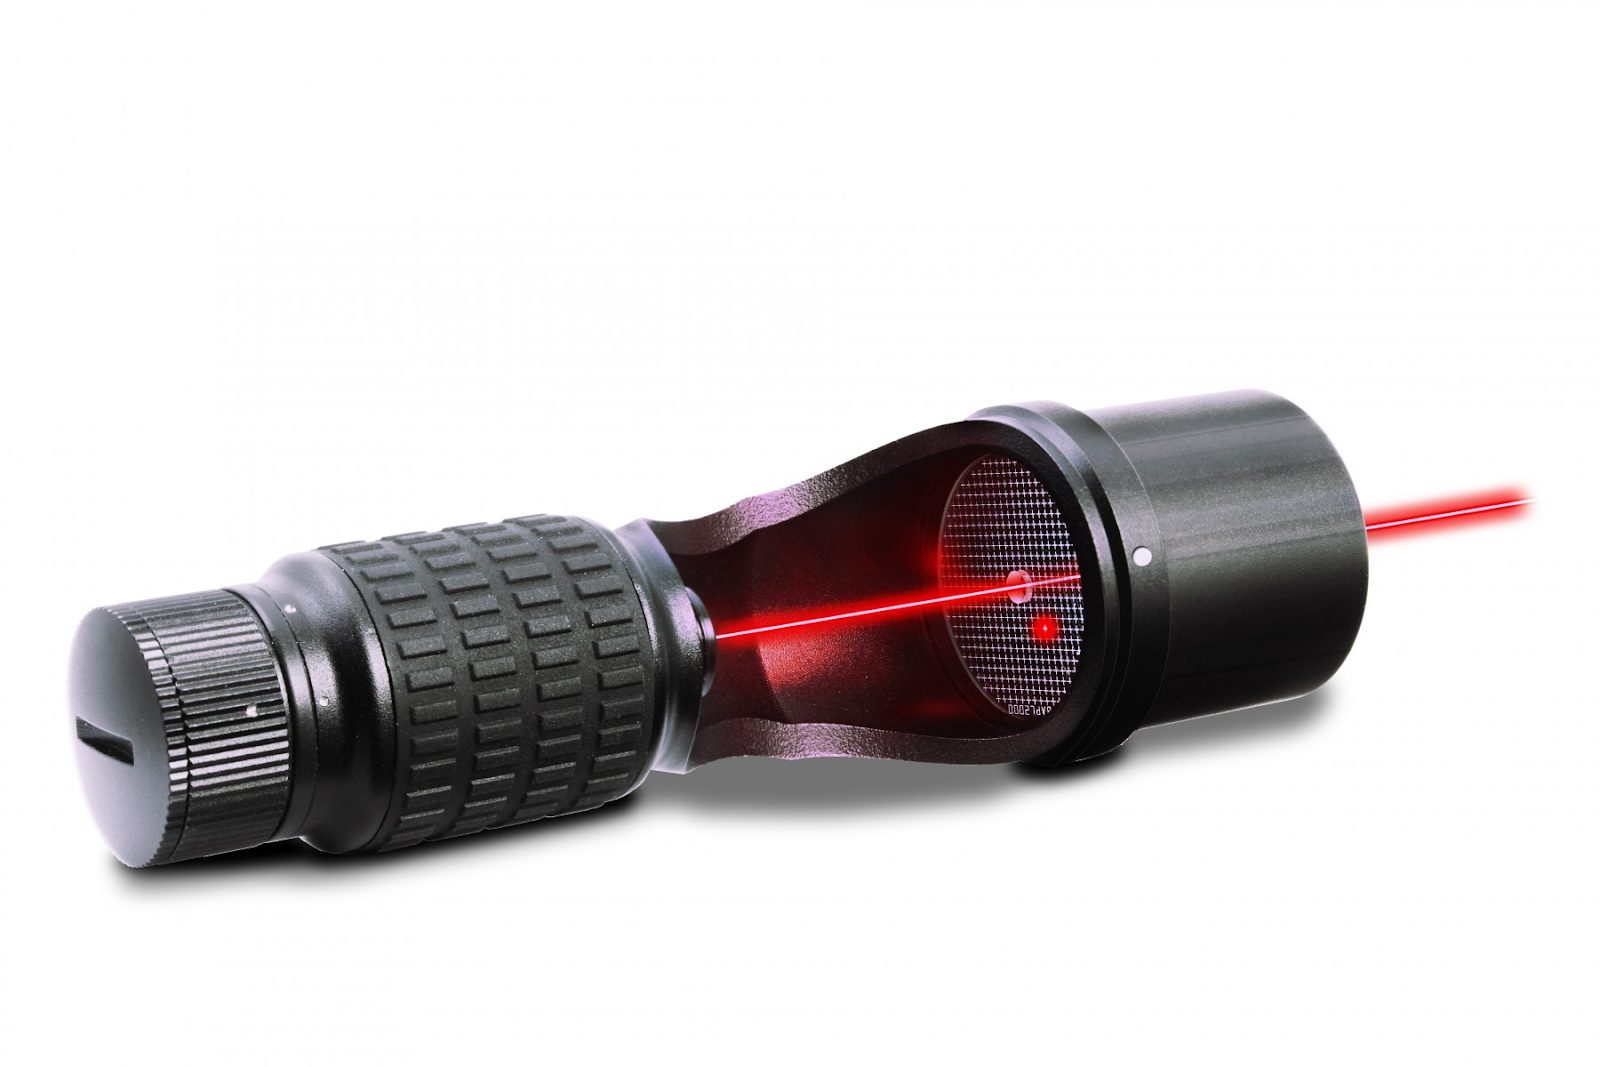
Adding a transparent disc with a small hole in the middle would increase the possible precision of the collimator. The disc just needs to be centered in the laser beam.All you have to do is to identify a spot that lets you put in a thin foil-disc, centered and ideally perpendicular to the beam. 
I have used a 0.1-0.15 mm thick transparent plastic sheet. Such as a printable transparent foil to create slides for old school projectors. A stiffer and thicker plastic from flat packaging blisters should also work just fine.
Measure the required diameter and get yourself a circular cutter with a needle in the middle. Cut out a round disc that fits your chosen spot snugly with minimal to no play but without crumbling or bending. I needed multiple iterations to get a fit that satisfied me.
IMG_20240129_210140.jpg


The central hole measures about 1 mm in diameter and it is perfectly centered in the beam. If your plastic foil material is very transparent, you might want to make the surface a little matte to get some contrast to see the reflected beam. I did this with a fine sandpaper.

When you have sorted out these things and you are happy with the overall optical properties (hole size, visibility of the reflected dot, centering of the hole relative to the beam), you can attach it to your laser.

Alignment of laser and disc:
IMG_20240129_210341.jpg


Depending on your situation, you can attach the disc with double sided tape or secure it with an o-ring or just clamp it between two sides of a thread.Test everything before you glue something into your equipment.

Fixed with O-Ring underneath the thread (first version):

IMG_20240131_183336.jpg

Clamped between two threads (second version):
IMG_20240129_210257.jpg


In my testing I was using a 1.25 to 2” adapter from TS-Optics to directly fit onto my GPU-corrector. In a second version I was using a 1.25” to T2 adapter combined with a M54 to T2 adapter to avoid the possible tilt of the clamp mechanism.
https://www.teleskop-express.de/de/adapter-10/adapter-1-25-und-24-5mm-125/ts-optics-adapter-von-2-auf-1-25-mit-messingklemmring-und-filtergewinde-281
https://www.teleskop-express.de/de/adapter-10/adapter-t2-m42x0-75-122/ts-optics-adapter-von-t2-auf-1-25-okularanschluss-an-t2-gewinde-7881
https://www.teleskop-express.de/de/adapter-10/adapter-t2-m42x0-75-122/ts-optics-t2-fokaladapter-fuer-skywatcher-auszuege-mit-m54x1-innengewinde-203

The second version (directly screwed to the focuser) was superior to the collimation with the GPU-corrector in place. 
With this little extra disc, you can easily bring the reflected beam perfectly on top of the original beam without any guesswork. This maybe gives you the best possible collimation you can get with a simple laser:
IMG_20240201_121836.jpg

Best regards, 
Volker
Edited ...
Like
Pinguru 8.73
...
· 
Now with pictures in my opening post. They got lost somehow along the way... :-(
Like
 
Register or login to create to post a reply.