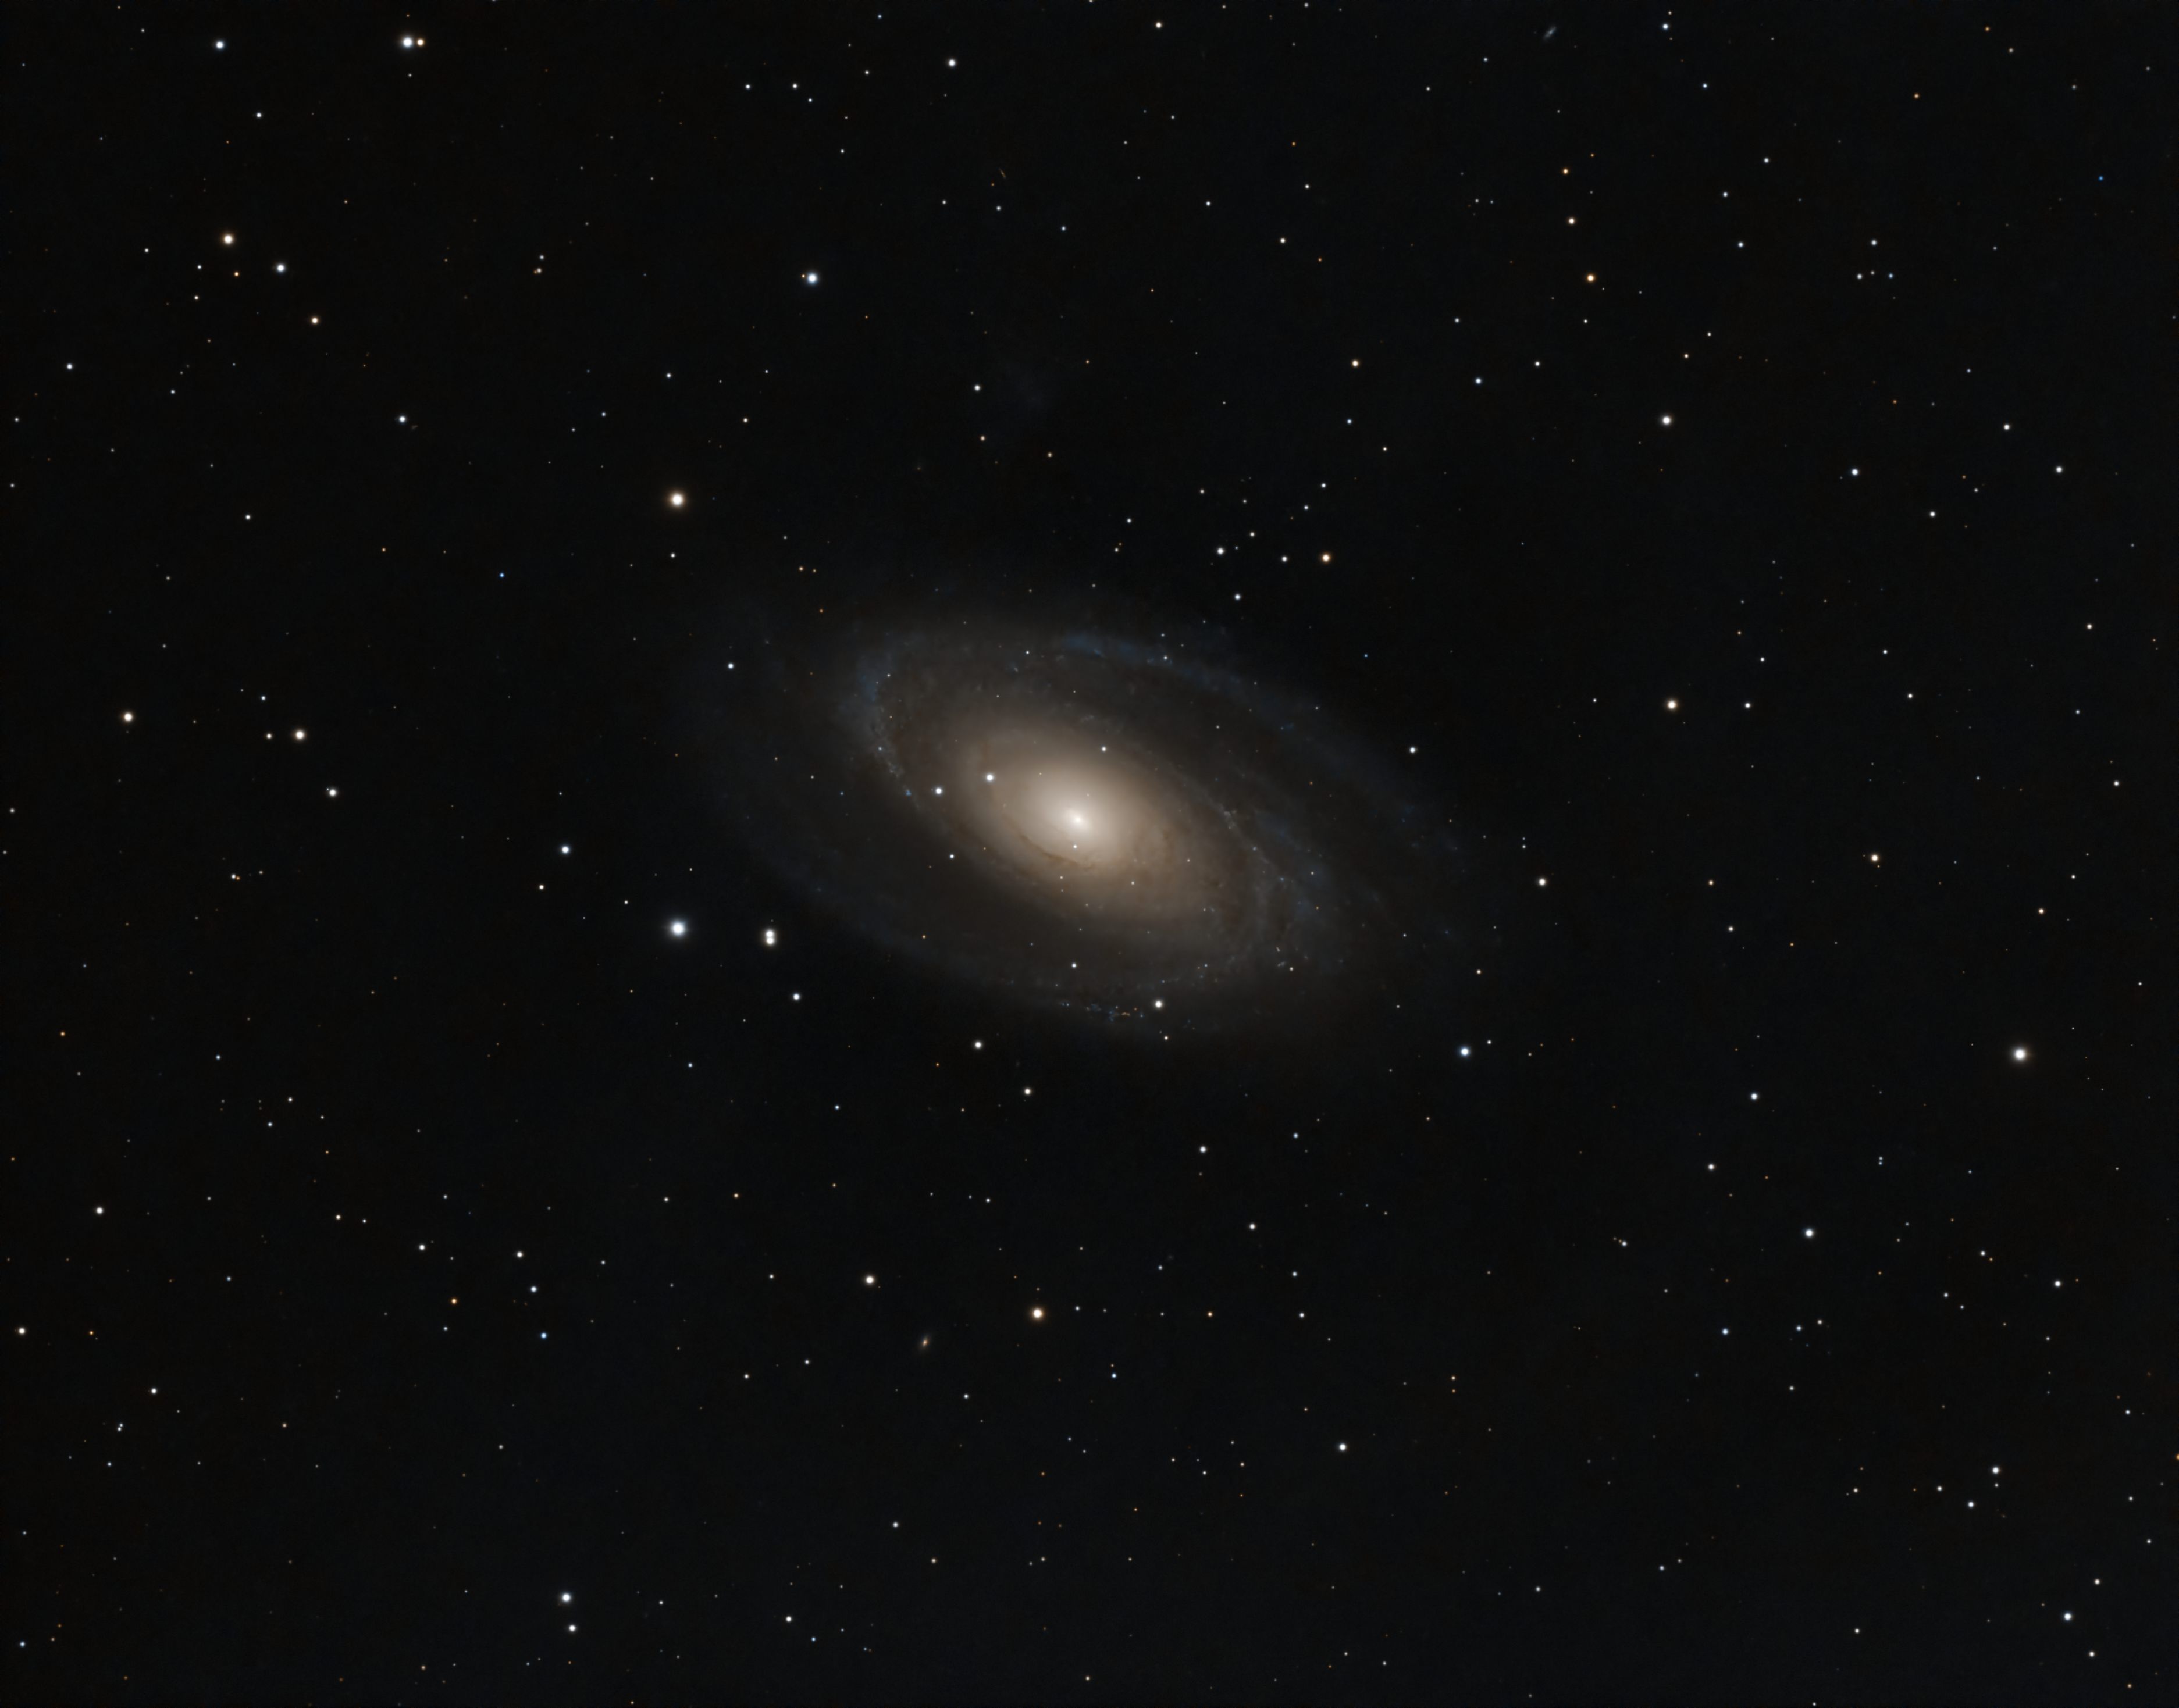
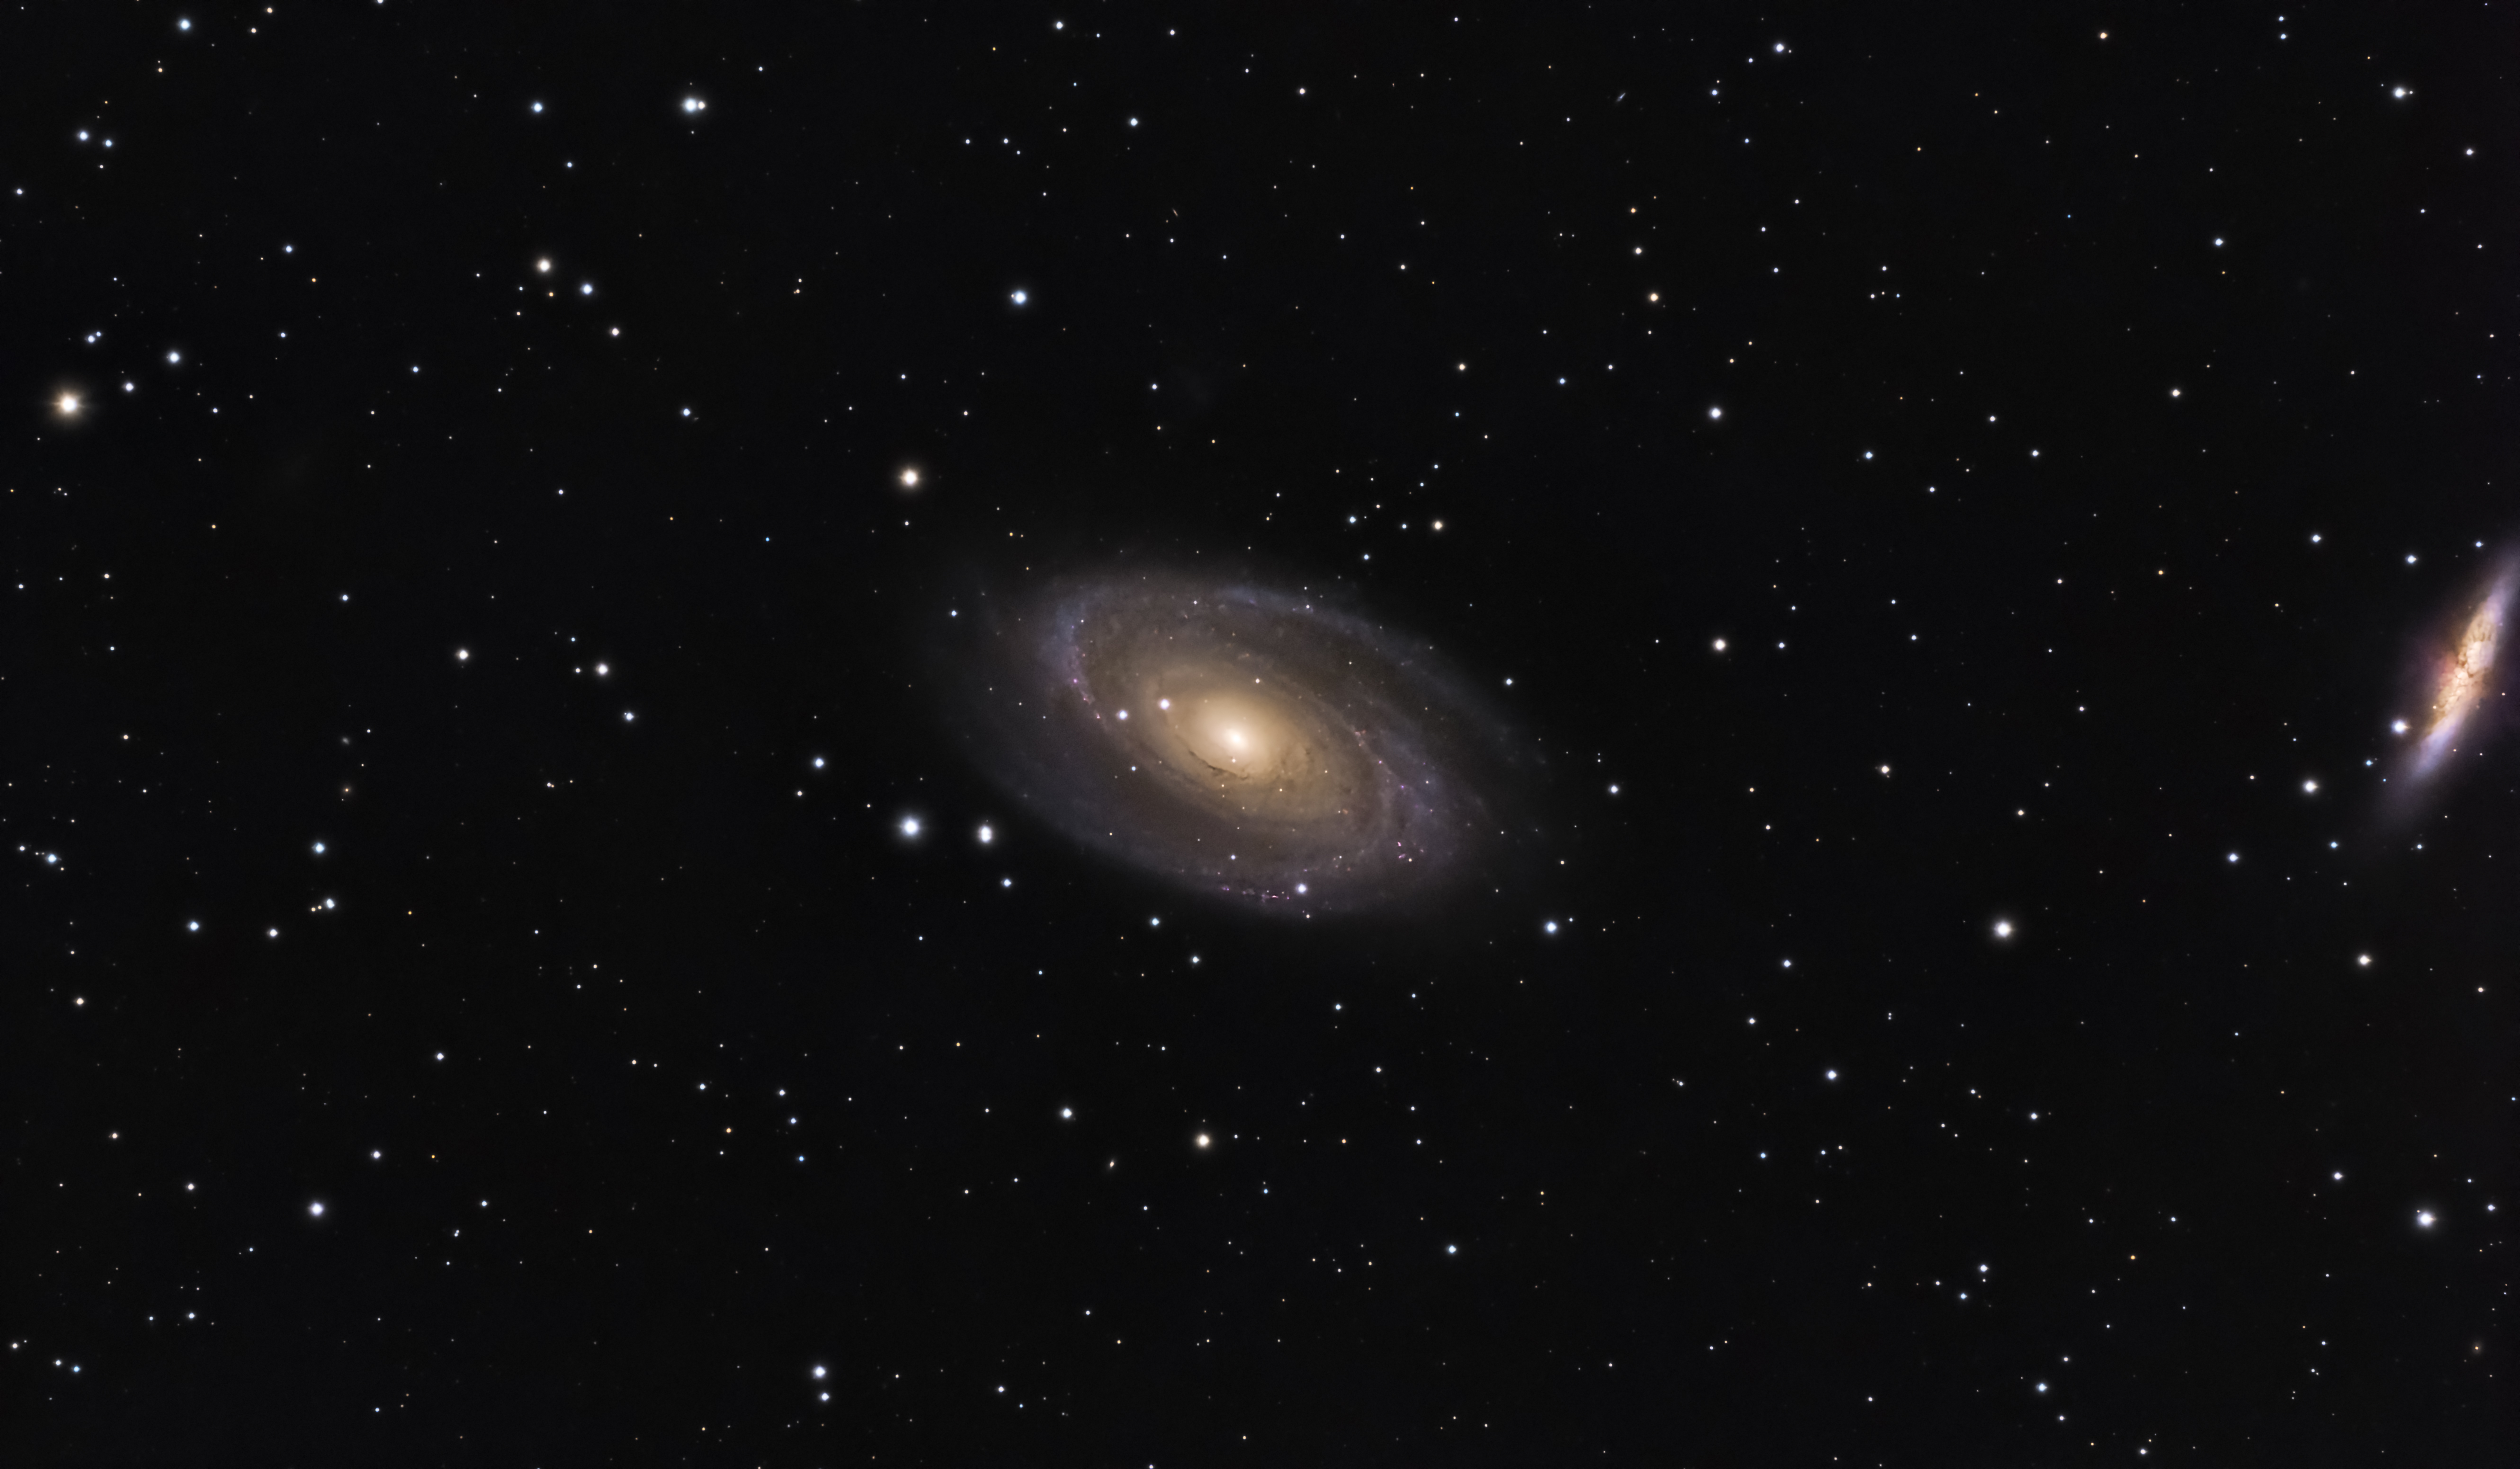
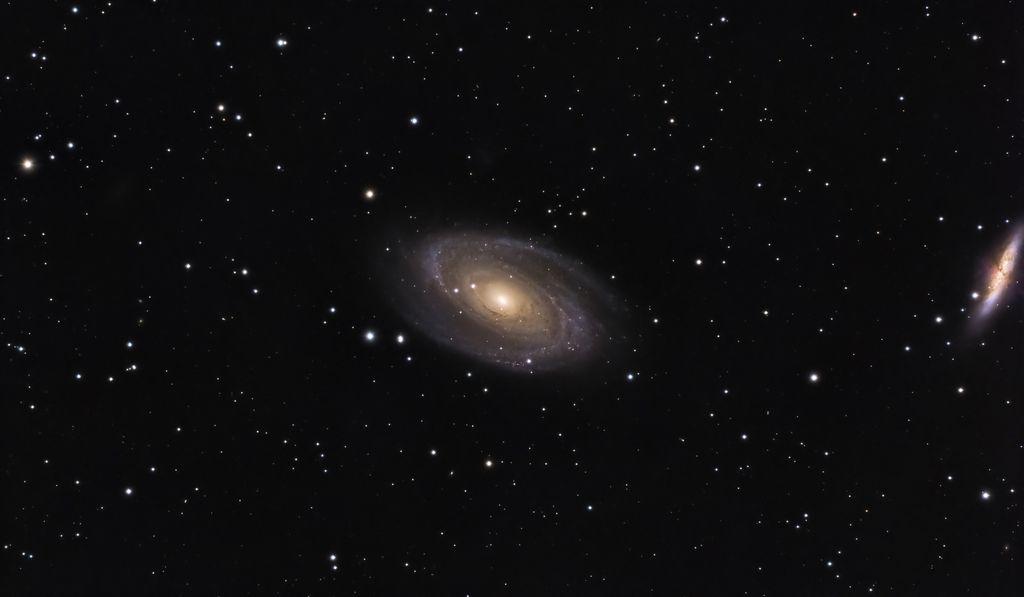
I absolutely love seeing other people have a go at processing my data, so here is my most recent acquisition of Bodes galaxy about 18 hours under Bortle 8 skies.
M81 03-2024
My personal end image came out a little nosier than I wanted, I could have increased noise reduction at the cost of crispyness.
This is my PixInsight workflow for this image:
- Dynamic Crop
- Dynamic Background Extraction
- Image Solver
- Spectrophotometry–based Color Calibration
- Single Color Noise Reduction (green)
- BlurXterminator (correct only)
- Histogram Transformation Stretch
- General Hyperbolic Stretch
- StarXterminator
- Masked GHS Stretch (starless version)
- Masked ACDNR
- Color Saturation Adjustment on star layer
- PixelMath (recombine starless + stars)
- BlurXterminator (sharpen stellar and non stellar)
Then I proceeded to take it into Photoshop for final curves adjustments and noise reduction
|
You cannot like this item. Reason: "ANONYMOUS".
You cannot remove your like from this item.
Editing a post is only allowed within 24 hours after creating it.
You cannot Like this post because the topic is closed.
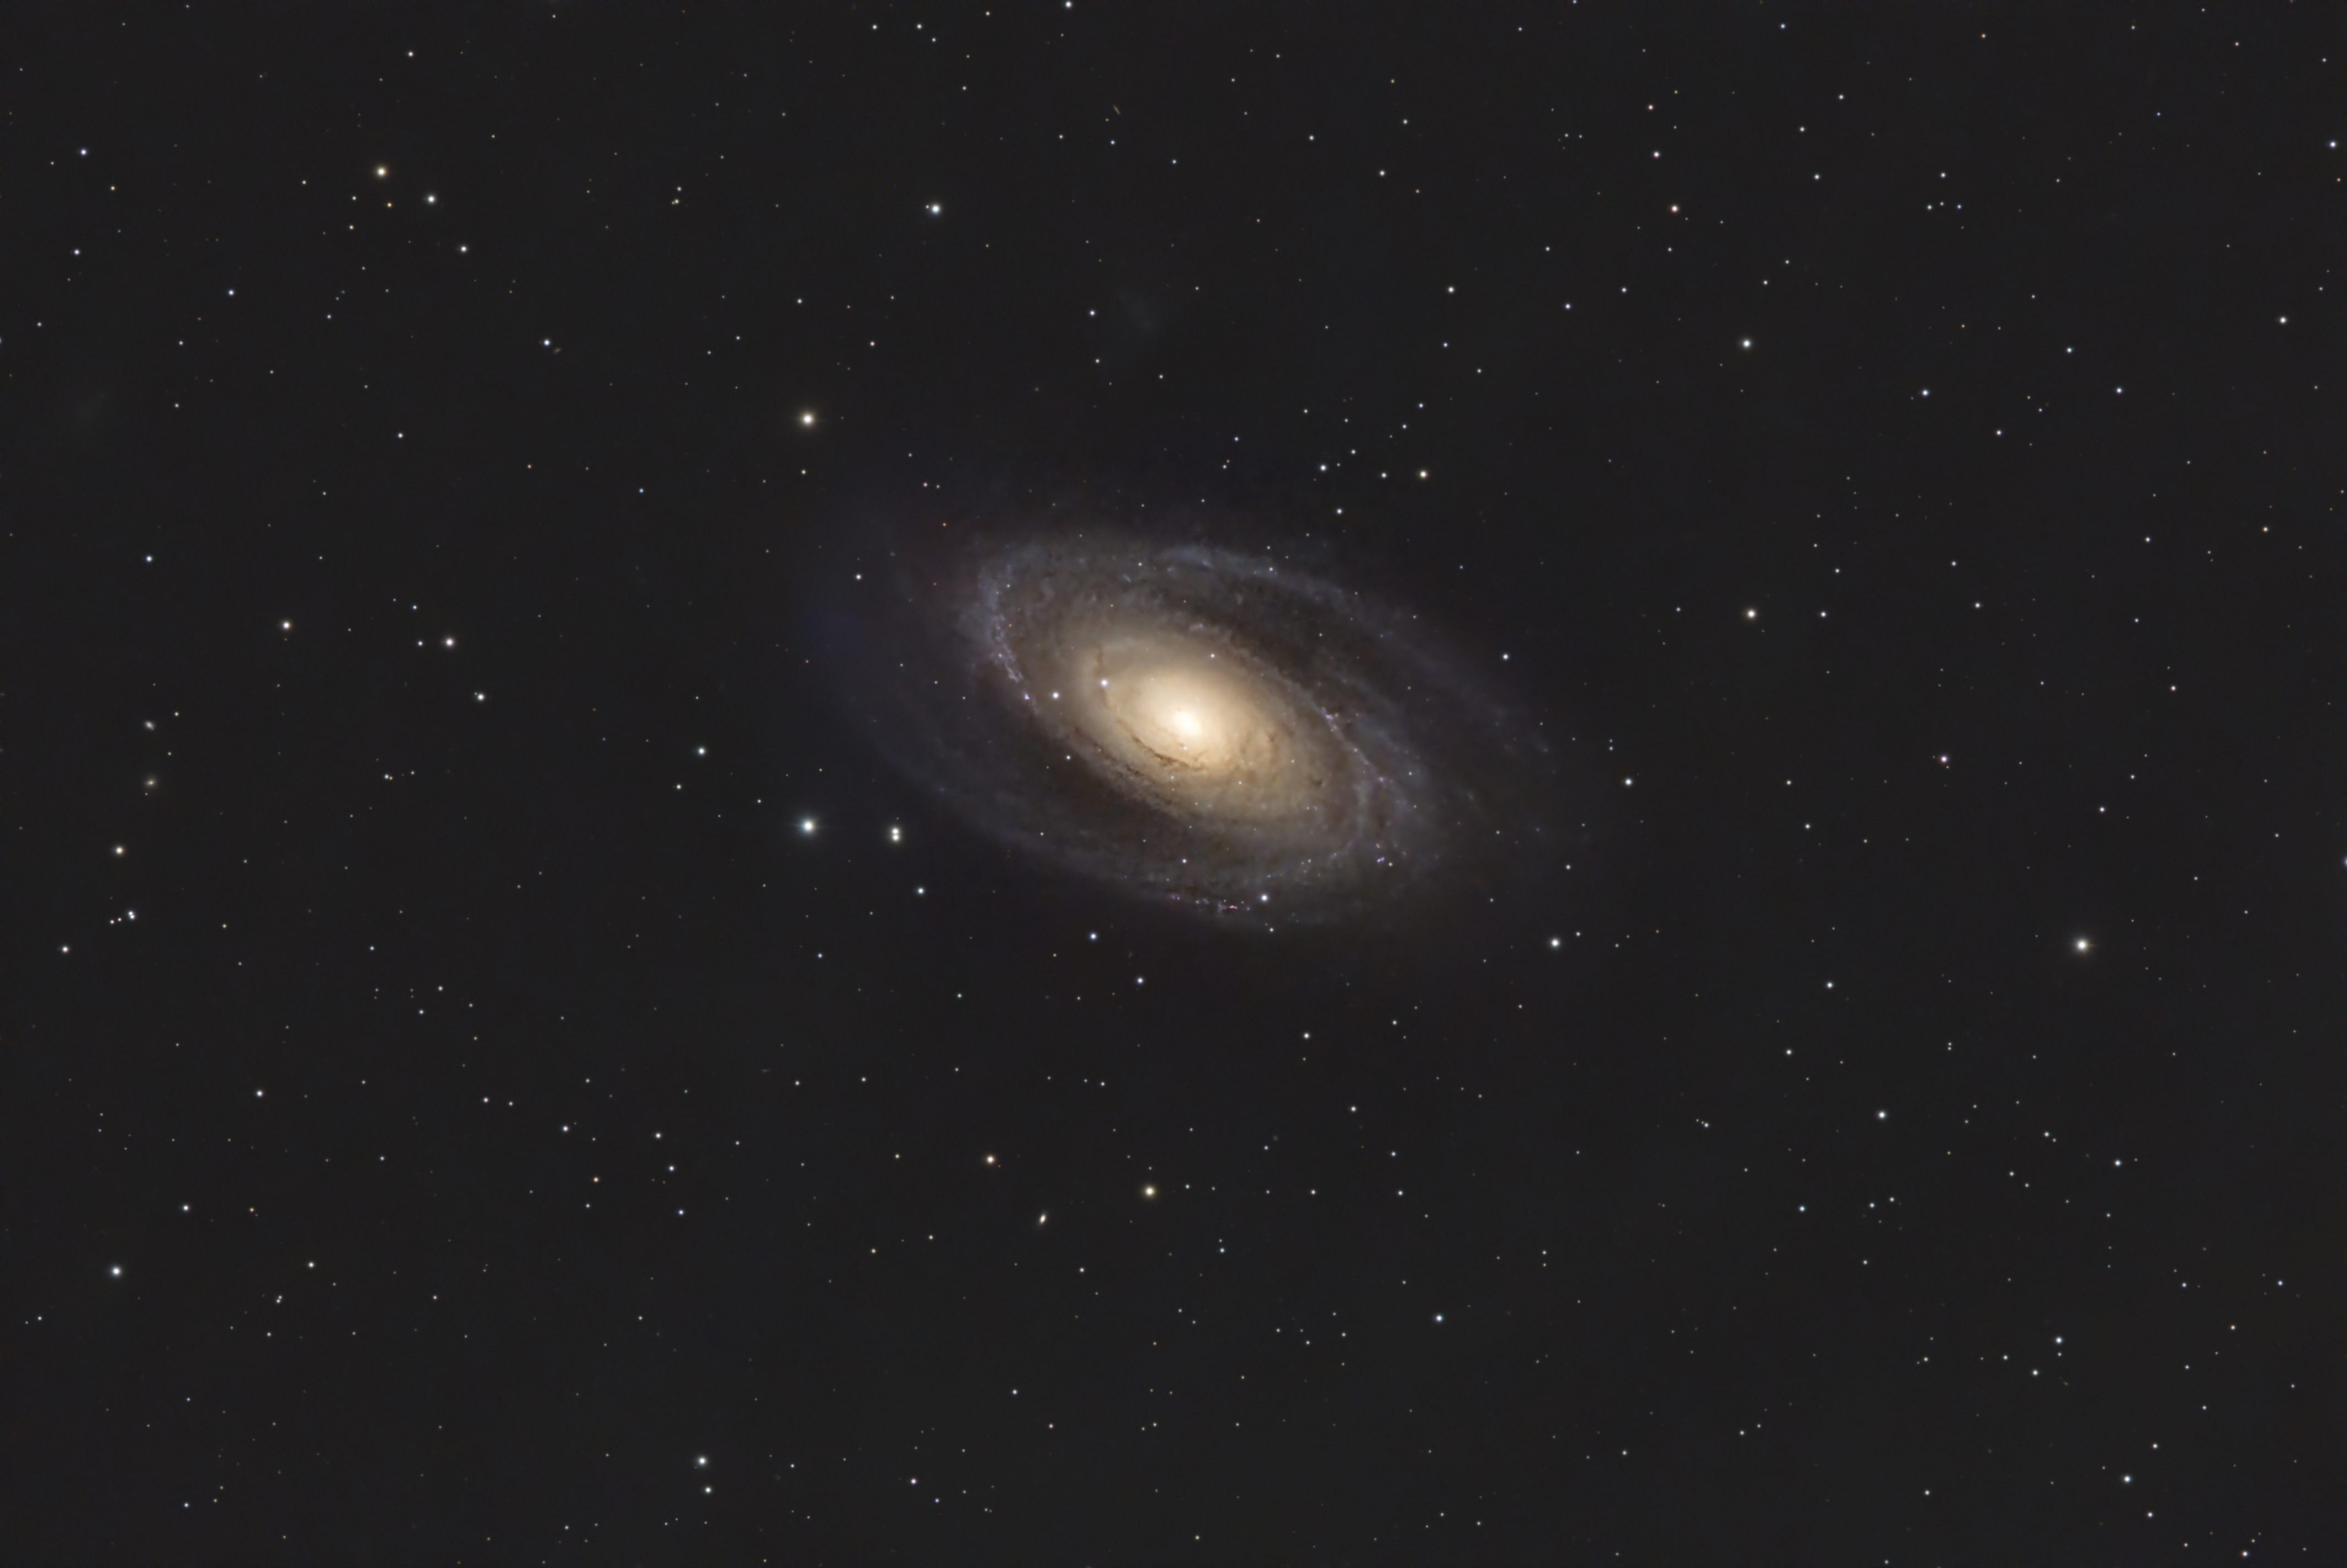
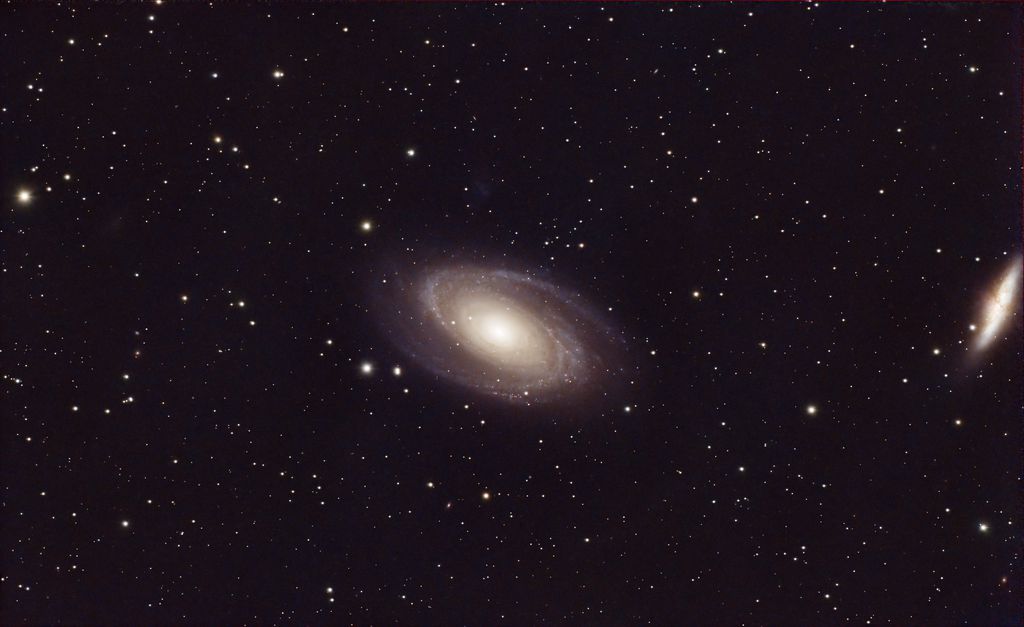
I more or less followed the same steps as you. Instead of DBE I used the gradient correction process. I did correct only BlurX before SPCC, and then normal BlurX after SPCC. I took the stars out before any stretching, and used histogram transformation to stretch the stars, but GHS for the starless image. I apparently didn't make a very good mask because when upping the blue saturation, it did in the background too. That's something I would fix if it was my image but not when doing a quick one like this.
For anyone else looking to do SPCC, when doing image solver enter 450 for the focal length and it should solve. |
You cannot like this item. Reason: "ANONYMOUS".
You cannot remove your like from this item.
Editing a post is only allowed within 24 hours after creating it.
You cannot Like this post because the topic is closed.
You cannot like this item. Reason: "ANONYMOUS".
You cannot remove your like from this item.
Editing a post is only allowed within 24 hours after creating it.
You cannot Like this post because the topic is closed.
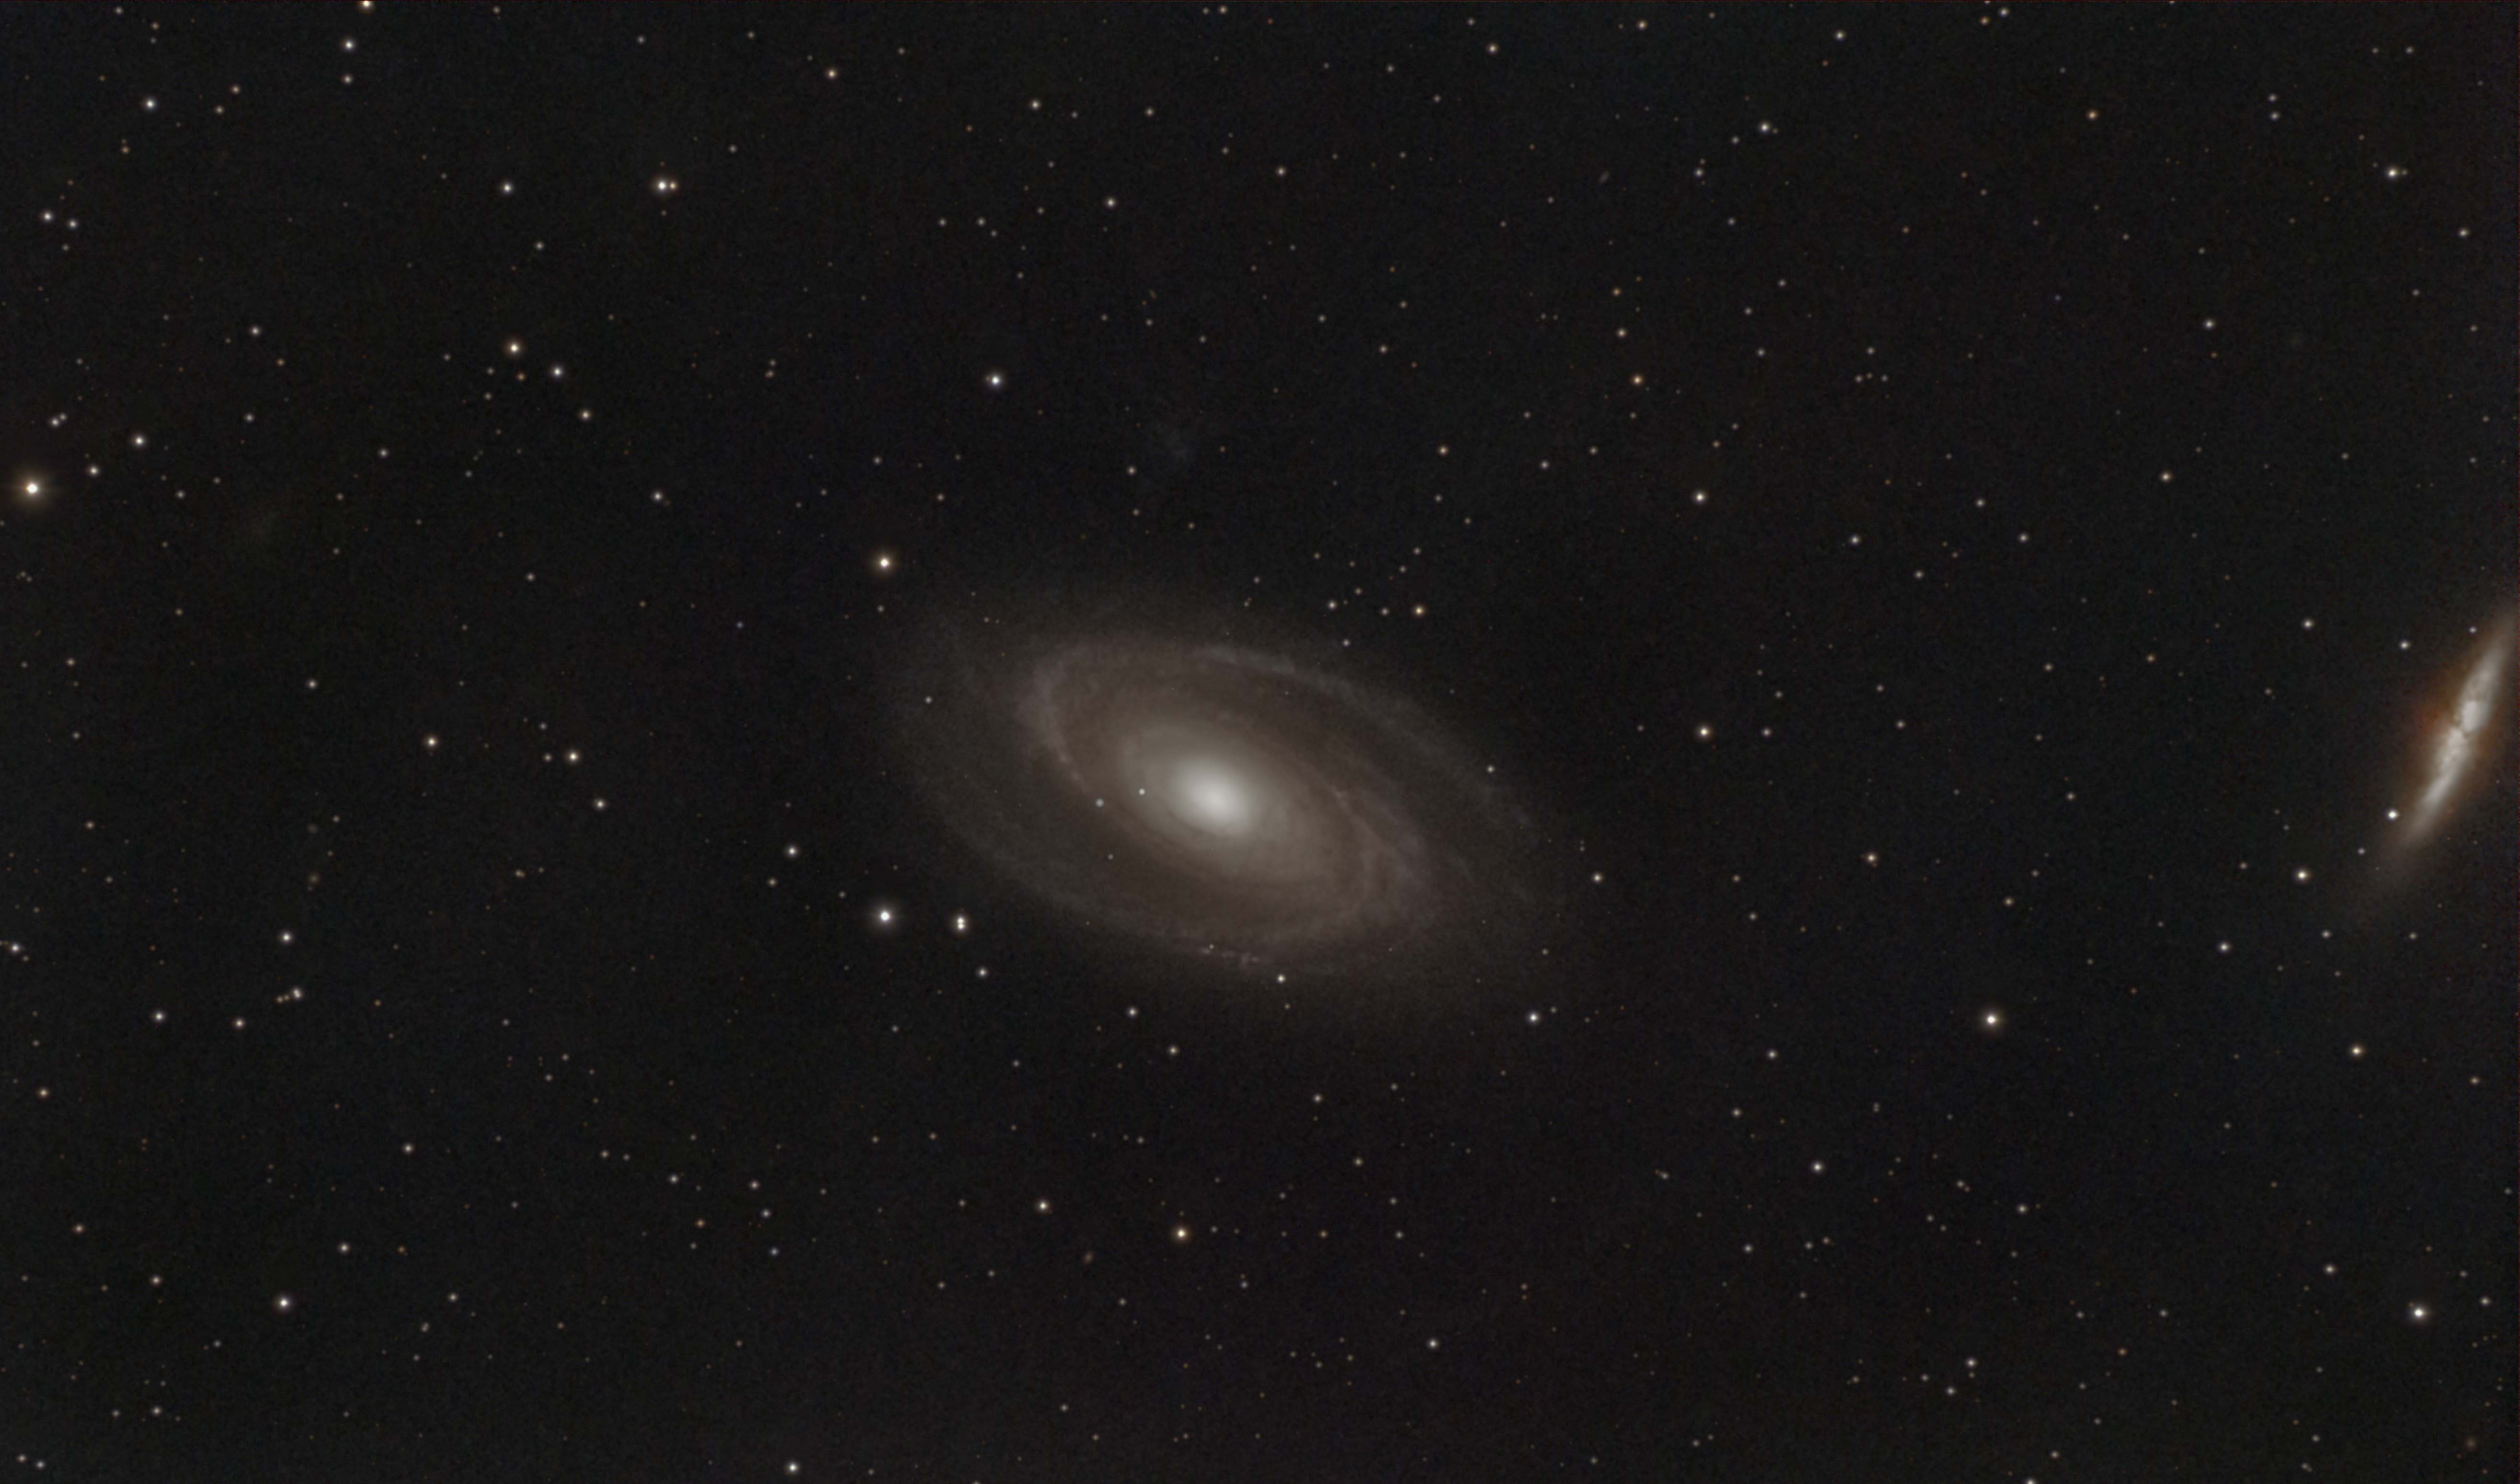
Okay, here it is:
What I did:
- Autostretch
- Background Extraction
- Starnet
Starless:
- GHS stretch
- Asinh black point increase
- Normal black point increase
- More stretching
- Reds and oranges saturation increase
Moved Starless into Photoshop Camera Raw:
- Color noise reduction
- Highlights reduction
Moved Starless into Astrosharp:
- AstroClean (noise reduction)
Moved Starless back into Siril:
- Asinh black point increase
Moved Starless back into Photoshop:
- Orange color desaturation
Added Stars image into Photoshop
- Stars image superimposed onto Starless using Lighten (both layers still separated)
- Stars stretched
- Stars on galaxy blurred a little
- Stars saturated a little
- Cigar galaxy selected and saturated reds on it
- Image layers flattened
- Image cropped
- Image exported
And I think that's what I did; this is all from memory, so I'm not 100% sure.
EDIT: I also wasn't able to pull out any blues from either galaxy, and I like Quinn's version better.
|
You cannot like this item. Reason: "ANONYMOUS".
You cannot remove your like from this item.
Editing a post is only allowed within 24 hours after creating it.
You cannot Like this post because the topic is closed.
hi
maybe add script GAME for galaxies.
also don't forget with clone stamp you can create you custom mask
|
You cannot like this item. Reason: "ANONYMOUS".
You cannot remove your like from this item.
Editing a post is only allowed within 24 hours after creating it.
You cannot Like this post because the topic is closed.
18 hrs. From Bortle 8 skies. Needed some noise reduction   |
You cannot like this item. Reason: "ANONYMOUS".
You cannot remove your like from this item.
Editing a post is only allowed within 24 hours after creating it.
You cannot Like this post because the topic is closed.
@Steve Cooper very nice edit! Thanks for sharing. I agree there's still way too much noise and probably could have benefited from more darks or integration. I've also seen examples such as @Quinn Groessl version which are a lot cleaner at the cost of not as bright, so it's a 50/50 coin.
I always worry if I'm over stretching data or not.
Great work
Fabian
|
You cannot like this item. Reason: "ANONYMOUS".
You cannot remove your like from this item.
Editing a post is only allowed within 24 hours after creating it.
You cannot Like this post because the topic is closed.
Okay, here it is:
What I did:
- Autostretch
- Background Extraction
- Starnet
Starless:
- GHS stretch
- Asinh black point increase
- Normal black point increase
- More stretching
- Reds and oranges saturation increase
Moved Starless into Photoshop Camera Raw:
- Color noise reduction
- Highlights reduction
Moved Starless into Astrosharp:
- AstroClean (noise reduction)
Moved Starless back into Siril:
- Asinh black point increase
Moved Starless back into Photoshop:
- Orange color desaturation
Added Stars image into Photoshop
- Stars image superimposed onto Starless using Lighten (both layers still separated)
- Stars stretched
- Stars on galaxy blurred a little
- Stars saturated a little
- Cigar galaxy selected and saturated reds on it
- Image layers flattened
- Image cropped
- Image exported
And I think that's what I did; this is all from memory, so I'm not 100% sure.
EDIT: I also wasn't able to pull out any blues from either galaxy, and I like Quinn's version better.
Beautiful edit, thanks for taking the time to share.
I actually am surprised you decided to keep good ol M82 in the final image, as I hadn't initially framed my subs with the intention of focusing on M82 but it's neat to see it in there!
Good to see I'm not the only one that removes the orange tones from my images. Depending on which part of the sky my images come from, I've always had to use camera raw to play with the colors to try and get rid of light pollution orange cast.
I still am on the fence weather I like noise reduction better in PI or PS.
It's also interesting you use Lighten blend mode to add stars back onto starless, I used to use this method but recently before moving over to PI would use screen as I believed it looked a little more natural and the star edges weren't abruptly "cut off".
In the end it's all personal preference. Once again thanks for sharing  |
You cannot like this item. Reason: "ANONYMOUS".
You cannot remove your like from this item.
Editing a post is only allowed within 24 hours after creating it.
You cannot Like this post because the topic is closed.
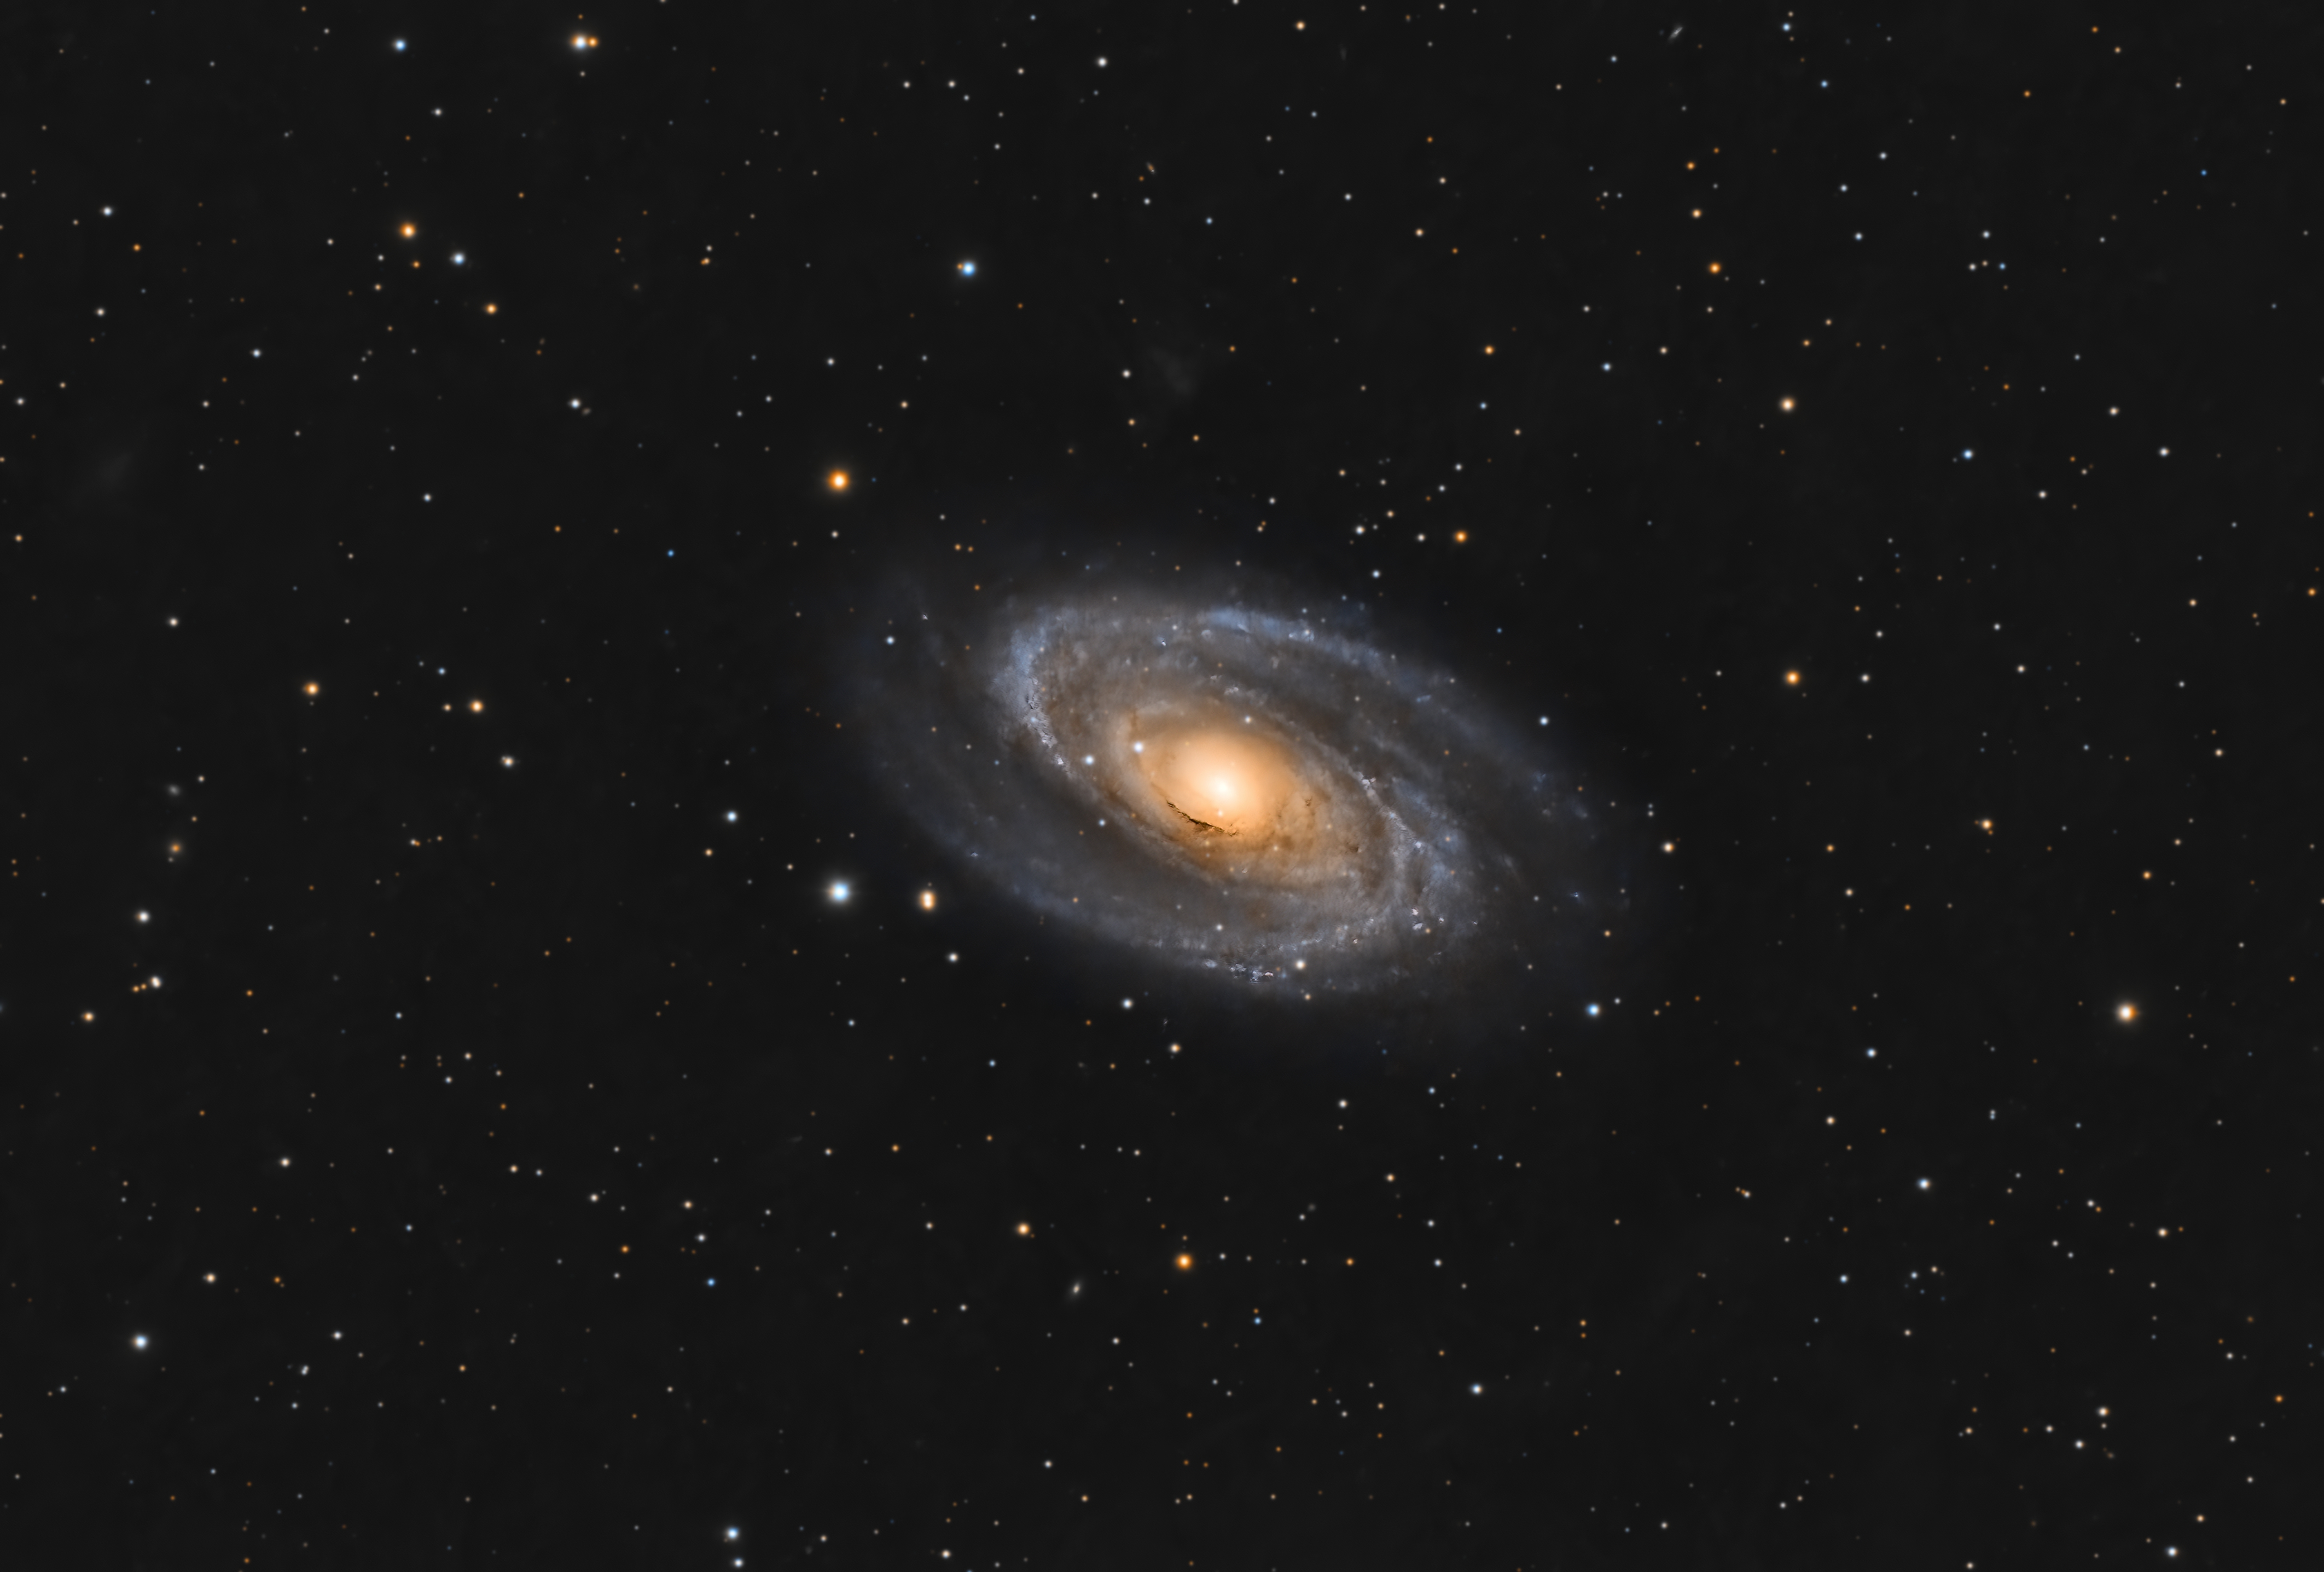
Quinn Groessl:
I more or less followed the same steps as you. Instead of DBE I used the gradient correction process. I did correct only BlurX before SPCC, and then normal BlurX after SPCC. I took the stars out before any stretching, and used histogram transformation to stretch the stars, but GHS for the starless image. I apparently didn't make a very good mask because when upping the blue saturation, it did in the background too. That's something I would fix if it was my image but not when doing a quick one like this.
For anyone else looking to do SPCC, when doing image solver enter 450 for the focal length and it should solve.
Excellent edit, I think yours is one of my favorites. I'm curious, is there any advantage over using Gradient Correction process versus DBE? I like that you were able to pull out some of the blue tones and also the center core looks well balanced and not blown out. Thanks for mentioning the masked saturation adjustment, I used to do that in Photoshop before I stared using PI and completely overlooked using that method to prevent adding additional noise or saturation to the sky background.
Also I'm really curious, why specifically 450 for the FL in SPCC? This image is originally taken at 600mm focal length, that's the number I've been using, is this wrong?
|
You cannot like this item. Reason: "ANONYMOUS".
You cannot remove your like from this item.
Editing a post is only allowed within 24 hours after creating it.
You cannot Like this post because the topic is closed.
Fabian Butkovich:
Quinn Groessl:
I more or less followed the same steps as you. Instead of DBE I used the gradient correction process. I did correct only BlurX before SPCC, and then normal BlurX after SPCC. I took the stars out before any stretching, and used histogram transformation to stretch the stars, but GHS for the starless image. I apparently didn't make a very good mask because when upping the blue saturation, it did in the background too. That's something I would fix if it was my image but not when doing a quick one like this.
For anyone else looking to do SPCC, when doing image solver enter 450 for the focal length and it should solve.
Excellent edit, I think yours is one of my favorites. I'm curious, is there any advantage over using Gradient Correction process versus DBE? I like that you were able to pull out some of the blue tones and also the center core looks well balanced and not blown out. Thanks for mentioning the masked saturation adjustment, I used to do that in Photoshop before I stared using PI and completely overlooked using that method to prevent adding additional noise or saturation to the sky background.
Also I'm really curious, why specifically 450 for the FL in SPCC? This image is originally taken at 600mm focal length, that's the number I've been using, is this wrong?
Gradient correction simply because it’s new and easier to use than DBE. I don’t have photoshop, so if it’s easier in there, then I’d say keep doing it in PS.
As for the focal length, I actually entered 350, but in the process box when it was done it said 450-something. As long as it solves, I would say it doesn’t really matter.
|
You cannot like this item. Reason: "ANONYMOUS".
You cannot remove your like from this item.
Editing a post is only allowed within 24 hours after creating it.
You cannot Like this post because the topic is closed.
You cannot like this item. Reason: "ANONYMOUS".
You cannot remove your like from this item.
Editing a post is only allowed within 24 hours after creating it.
You cannot Like this post because the topic is closed.
Here is my attempt, thanks for fun practice as I am working this and M81 as well. This was all done in Pixinsight.
Split Channels
For each channel:
Dynamic Crop
Gradient Correction
BlurXterminator
Combine Channels
SPCC
SCNR
StarXterminator
Extract Synthetic L From RGB
RGB:
GHS
NoiseXterminator
L:
GHS
HDR Multiscale Transform Mix with signal mask
Unsharpened Mask with signal mask
Multiscale Linear Transform with signal mask
Combine L, HDR, MLT for sharpened L
Dark Structure Enhance
NoiseXterminator
Final RGB:
LRGB Combination
GHS & Linear stretch for brightness and background
Curves for Color
GHS Stars
Curves for Star Color
PixMath Screen Combine Stars
 |
You cannot like this item. Reason: "ANONYMOUS".
You cannot remove your like from this item.
Editing a post is only allowed within 24 hours after creating it.
You cannot Like this post because the topic is closed.
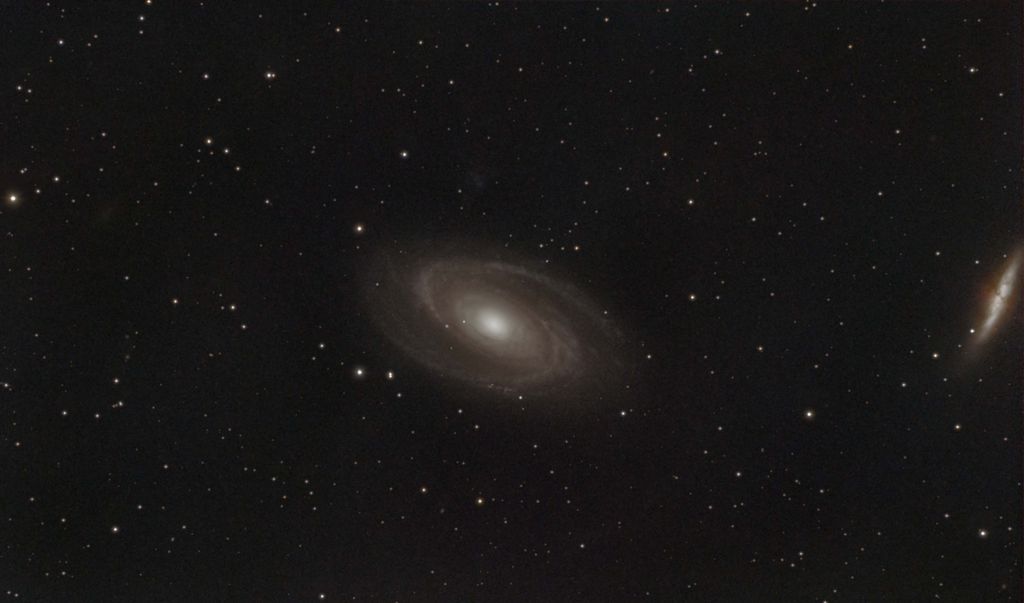
This is my effort...

Standard RGB workflow with PI
CS Tim
|
You cannot like this item. Reason: "ANONYMOUS".
You cannot remove your like from this item.
Editing a post is only allowed within 24 hours after creating it.
You cannot Like this post because the topic is closed.
I did mine on Pix and Ps with Xterminator suite.
 |
You cannot like this item. Reason: "ANONYMOUS".
You cannot remove your like from this item.
Editing a post is only allowed within 24 hours after creating it.
You cannot Like this post because the topic is closed.
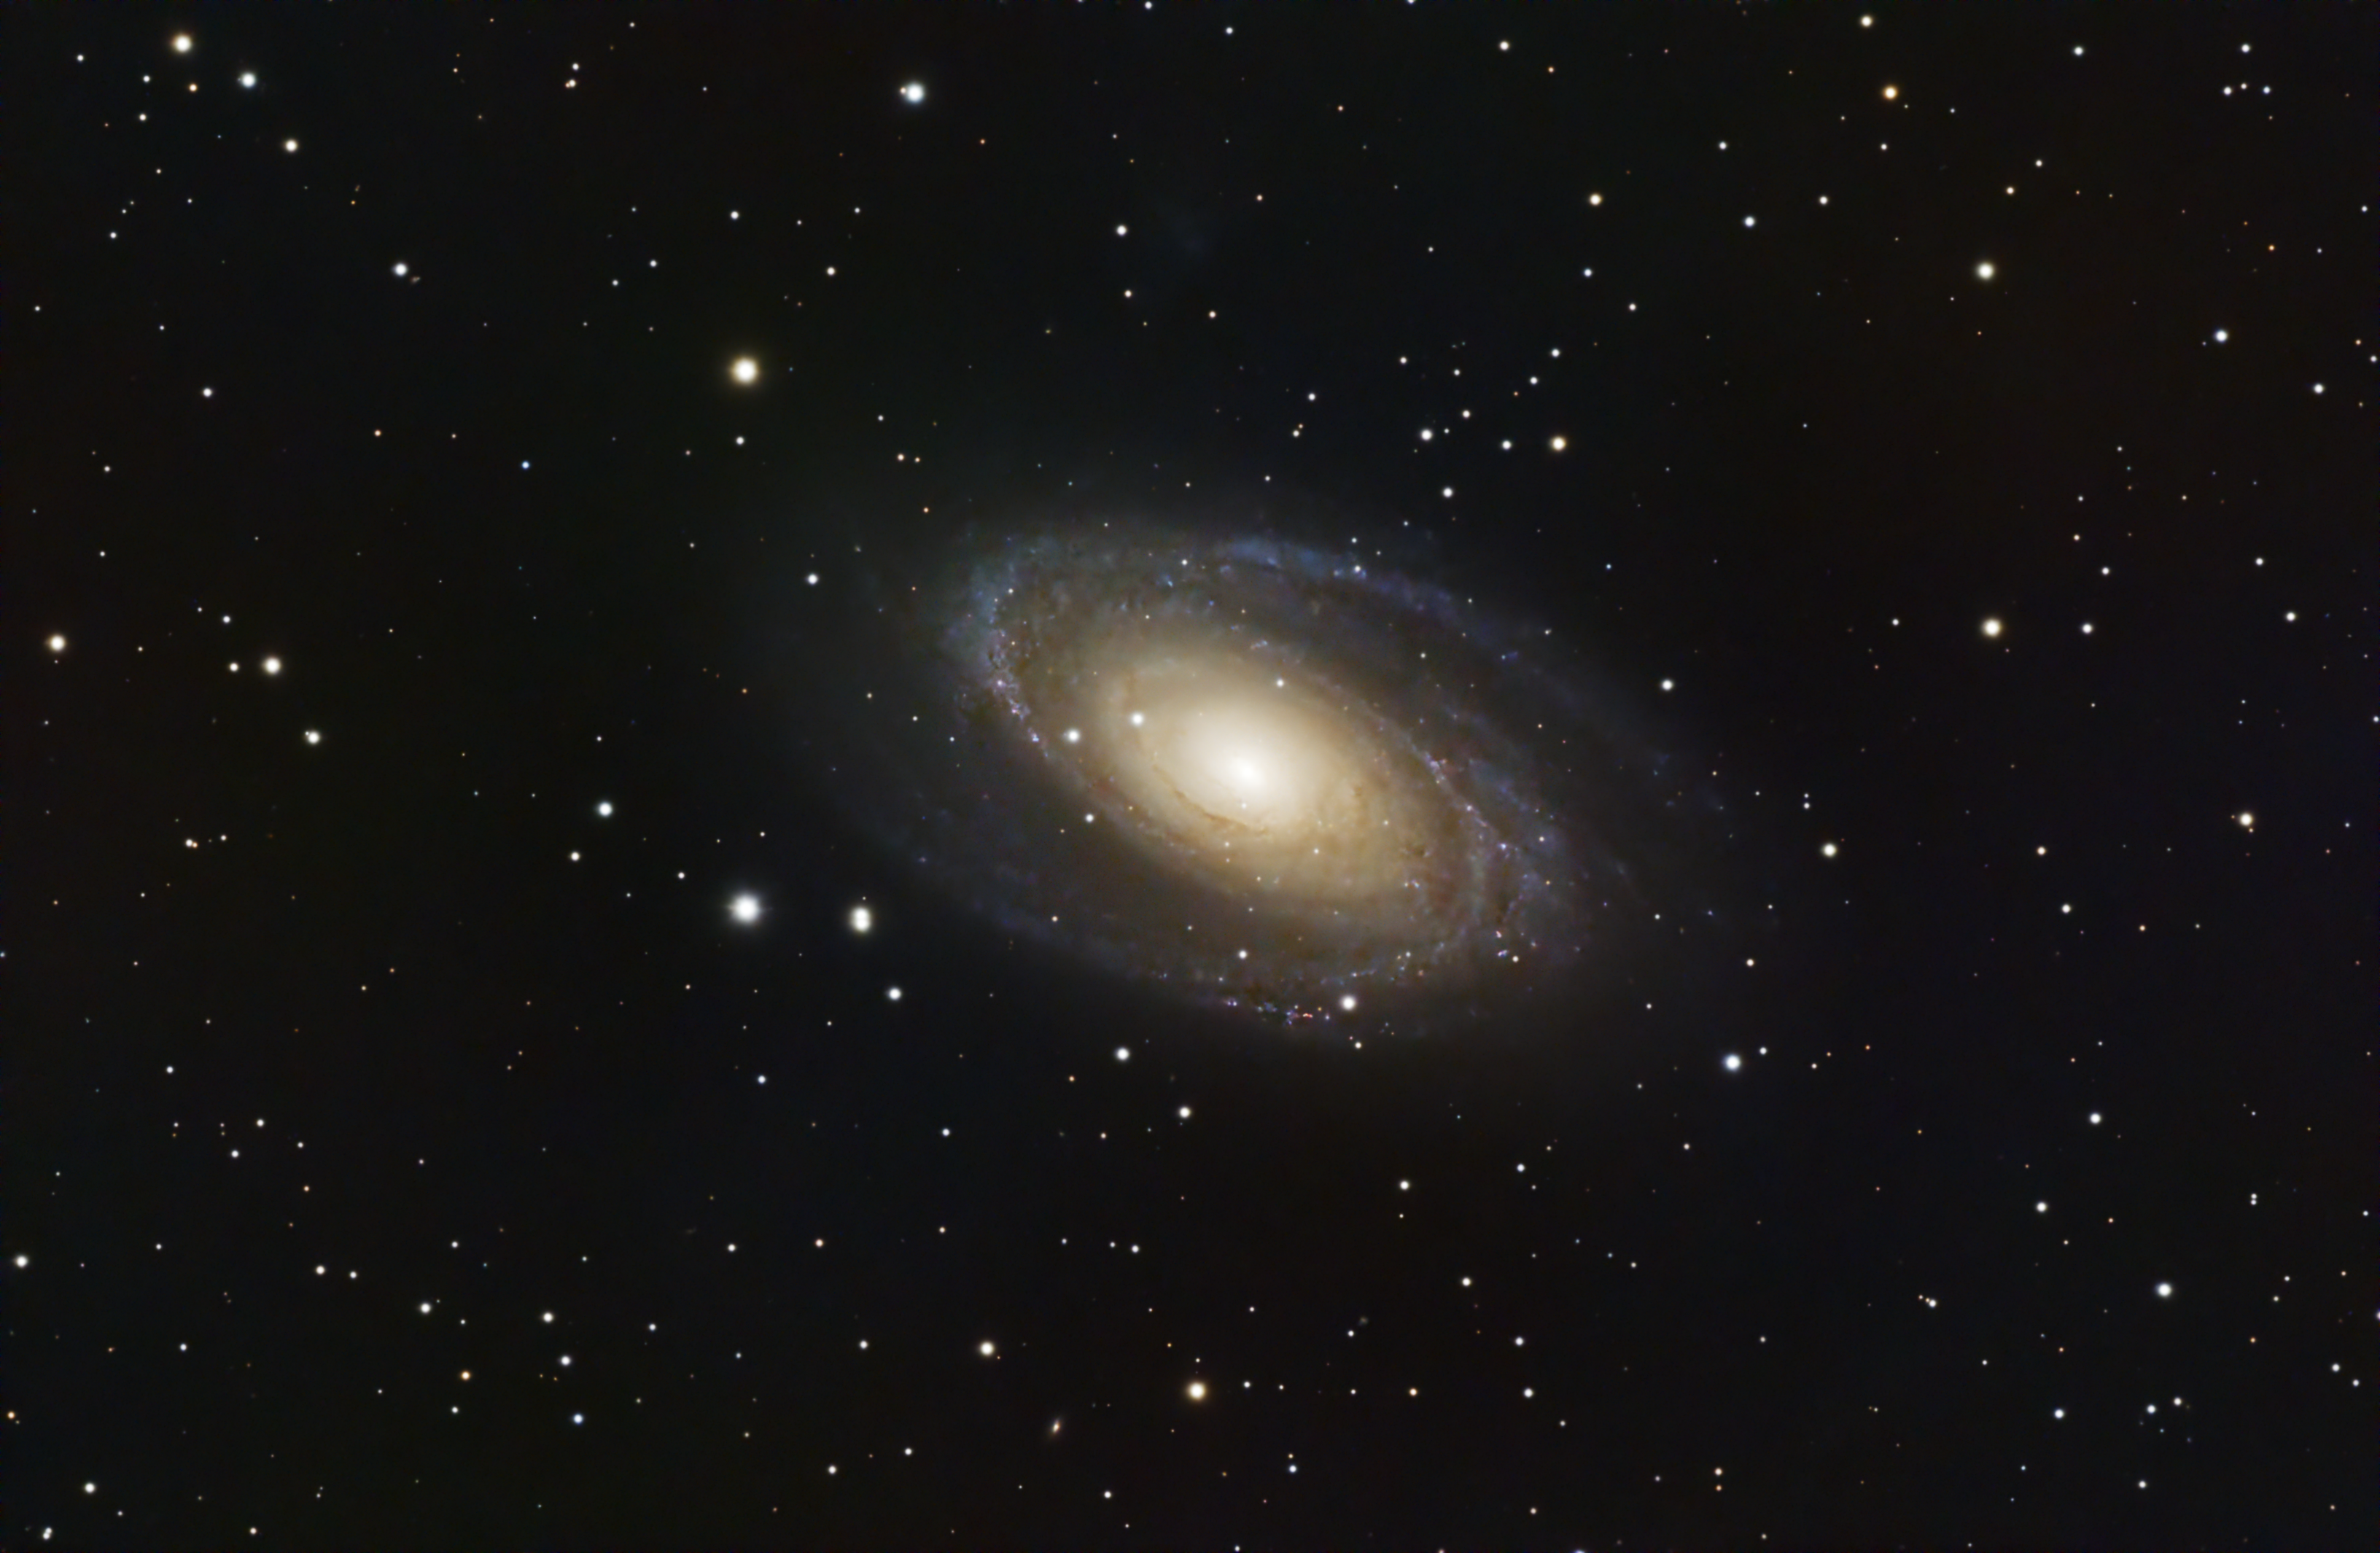
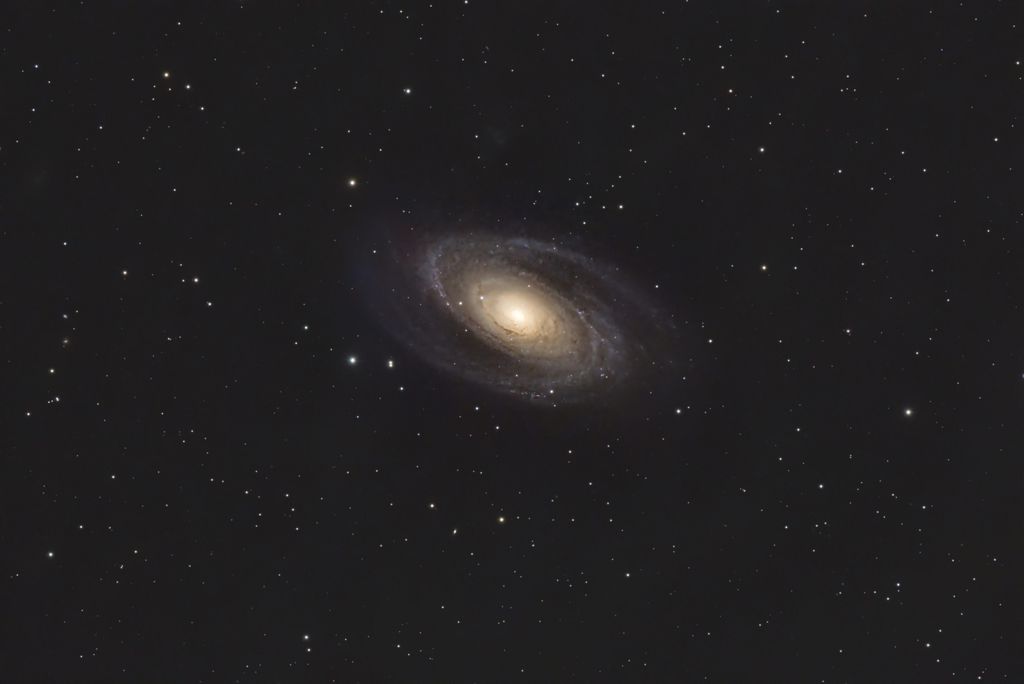
I'm a person that likes color so I put more color in my image for you than others may have. I used masks to help eliminate over saturating the background of the galaxy. That said I didn't add any color other then what your data provided. I added back your luminance to add the extra color.
Anyway my take on your data.
Dale
 |
You cannot like this item. Reason: "ANONYMOUS".
You cannot remove your like from this item.
Editing a post is only allowed within 24 hours after creating it.
You cannot Like this post because the topic is closed.
You cannot like this item. Reason: "ANONYMOUS".
You cannot remove your like from this item.
Editing a post is only allowed within 24 hours after creating it.
You cannot Like this post because the topic is closed.
|
I'm in the midst of struggling through my own processing, so I'm here to offer solidarity. I've got 28h of widefield broadband data and not enough processing skills to bring out the lovely IFN, while also making the galaxies look good. Brutal!
|
You cannot like this item. Reason: "ANONYMOUS".
You cannot remove your like from this item.
Editing a post is only allowed within 24 hours after creating it.
You cannot Like this post because the topic is closed.
Dale Penkala:
I'm a person that likes color so I put more color in my image for you than others may have. I used masks to help eliminate over saturating the background of the galaxy. That said I didn't add any color other then what your data provided. I added back your luminance to add the extra color.
Anyway my take on your data.
Dale
Lovely edit! While not as sharp as some of the others, I think you've certainly got the best color rendition in your version. The center core is really crisp with the thin brown band I think it looks really good. Nice work Dale thanks for sharing 👍
I wonder if I could make a collaborative post where I blend everyone's together lol
|
You cannot like this item. Reason: "ANONYMOUS".
You cannot remove your like from this item.
Editing a post is only allowed within 24 hours after creating it.
You cannot Like this post because the topic is closed.
Fabian Butkovich:
Dale Penkala:
I'm a person that likes color so I put more color in my image for you than others may have. I used masks to help eliminate over saturating the background of the galaxy. That said I didn't add any color other then what your data provided. I added back your luminance to add the extra color.
Anyway my take on your data.
Dale
Lovely edit! While not as sharp as some of the others, I think you've certainly got the best color rendition in your version. The center core is really crisp with the thin brown band I think it looks really good. Nice work Dale thanks for sharing 👍
I wonder if I could make a collaborative post where I blend everyone's together lol
I’m glad you like it, and feel free to use it if you like. I really didn’t spend much time on this image so I’m sure I could do more with it but for a quick processing this is what I was able to get.
Dale
|
You cannot like this item. Reason: "ANONYMOUS".
You cannot remove your like from this item.
Editing a post is only allowed within 24 hours after creating it.
You cannot Like this post because the topic is closed.
My take
 |
You cannot like this item. Reason: "ANONYMOUS".
You cannot remove your like from this item.
Editing a post is only allowed within 24 hours after creating it.
You cannot Like this post because the topic is closed.
to create to post a reply.