David Payne:
How do I get it:
Alternatively, you can load the following into Pixelmath via copy and paste into the expression editor.... Two sections, between the, not include the ***s....
Into RGB/K:
*****
iif(b==0,EC=1,EC=0);
iif(b>0,Ds=D*b,Ds=D);
iif(b>0,bs=b,bs=1);
iif(EC==1,q0=exp(-Ds*SP),q0=(1+Ds*SP)^(-1/bs));
iif(EC==1,qWP=2-exp(-Ds*(HP-SP)),qWP=2-(1+Ds*(HP-SP))^(-1/bs));
iif(EC==1,q1=2-2*exp(-Ds*(HP-SP))+exp(-Ds*(2*HP-SP-1)),q1=2-2*(1+Ds*(HP-SP))^(-1/bs)+(1+Ds*(2*HP-SP-1))^(-1/bs));
iif($T<SP,EC*exp(-Ds*(SP-$T))+(1-EC)*(1+Ds*(SP-$T))^(-1/bs)-q0,iif($T>HP,2-EC*(2*exp(-Ds*(HP-SP))+exp(-Ds*(2*HP-$T-SP)))+(1-EC)*(2*(1+Ds*(HP-SP))^(-1/bs)+(1+Ds*(2*HP-$T-SP))^(-1/bs))-q0,2-EC*exp(-Ds*($T-SP))-(1-EC)*(1+Ds*($T-SP))^(-1/bs)-q0))/(q1-q0);
****
& into symbols:
****
D = 1.0;
b =0.5;
SP =0.00;
HP =1.00;
Rnorm;
q0;
qWP;
q1;
Ds;
bs;
EC;
*****
So what does it do?
You may be suprised at what these little equations can do for stretching...
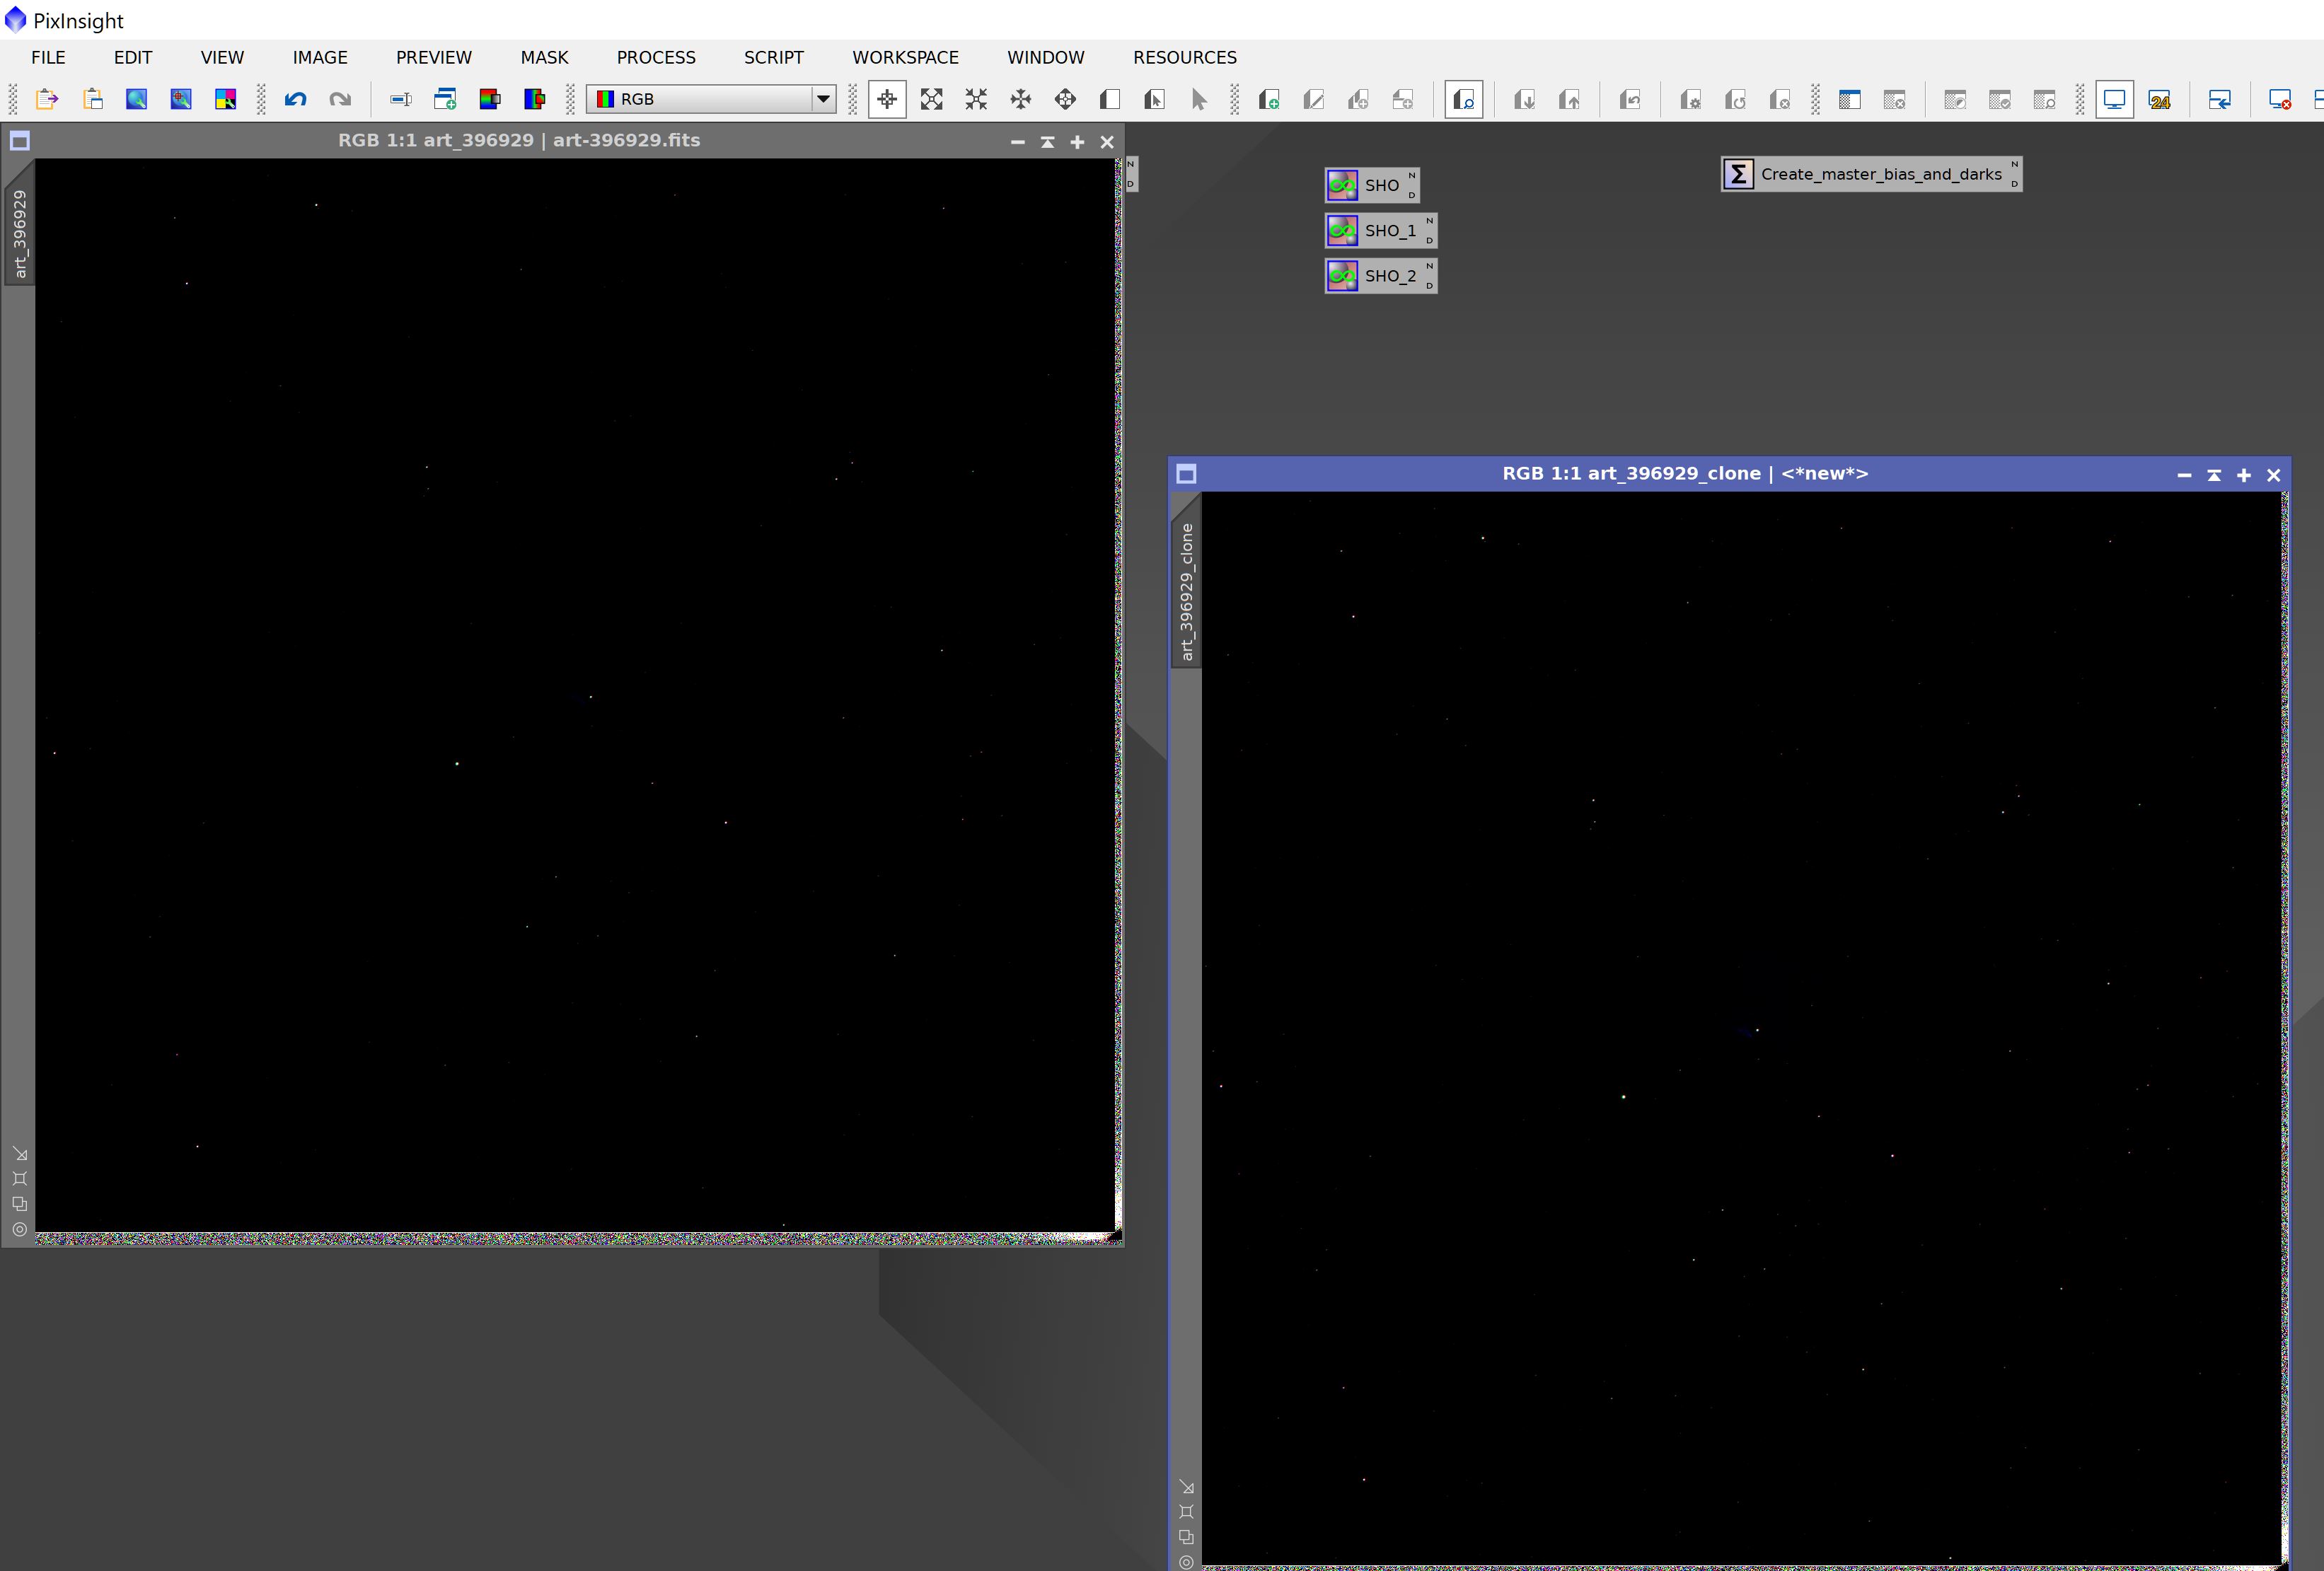
Thanks for sharing. I tried the Pixel Math version (as I couldn't figure out how to load the XPSM file as an icon). But when I applied it to a linear image, it seemed to do very little (see attached - linear on the left, after your process on the right).

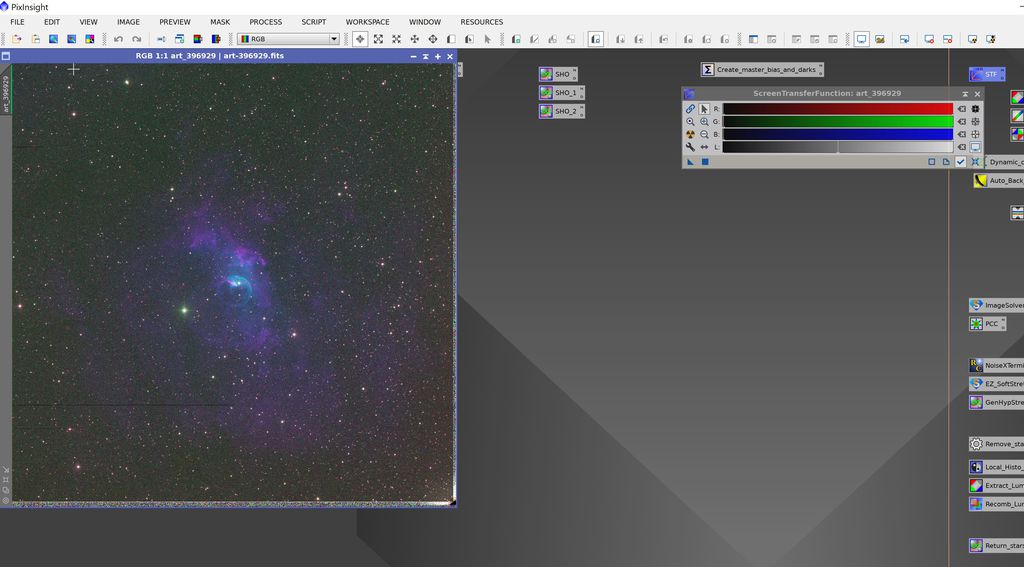
And just to prove that my image does contain some actual data, here is an unlinked STF applied to the same file
 |
You cannot like this item. Reason: "ANONYMOUS".
You cannot remove your like from this item.
Editing a post is only allowed within 24 hours after creating it.
You cannot Like this post because the topic is closed.
David Payne:
Götz Golla:
Hello @David Payne and fellow astronomers,
thanks a lot for sharing your formulas and your analysis and graphs about the generalized hyperbolic stretch transformations. This is very helpful for our whole community. Thank you for taking the time !
As a Siril user I often perceive that general concepts of astroprocessing are described with the perspective of a PixInsight user - which is absolutely OK. Beginners may conclude then that the features are only available in PI, or even are inventions of the PI programmers. This is neither the case for the GHS algorithms nor (for example) for star extraction with StarNet and other functions.
Stumbling over this thread after I have used GHS in Siril, I just would like to say that the GHS algorithm is also included in Siril with a very convenient GUI. A highly recommended and valuable addition to the toolbox 
Regards,
Goetz
Hi Goetz,
I agree with you, but ultimately it takes a programmer to actually put the algorithm/method into code and create a GUI for it. Thanks to @Mike Cranfield and @Adrian Knagg-Baugh for doing this for Pixinsight and Siril respectively - they are even collaborating on both. I am glad you like the process/script.
Cheers,
Dave
You're too kind, Dave, all I did for Siril was port your and Mike's excellent existing work! @Götz Golla im not sure if you're using the stable 1.0 series of Siril or the git version, but the version in git is more extensive and has a better user interface than the initial version that got backported to 1.0. It'll get a full release in v1.2 when that happens.
|
You cannot like this item. Reason: "ANONYMOUS".
You cannot remove your like from this item.
Editing a post is only allowed within 24 hours after creating it.
You cannot Like this post because the topic is closed.
HI Stuart. THe parameters particularly D (stretch amount) is very low in the Pixelmath example. Try a value of a few hundred for a linear image.
Cheers,
Dave
|
You cannot like this item. Reason: "ANONYMOUS".
You cannot remove your like from this item.
Editing a post is only allowed within 24 hours after creating it.
You cannot Like this post because the topic is closed.
Stuart Taylor:
David Payne:
How do I get it:
Alternatively, you can load the following into Pixelmath via copy and paste into the expression editor.... Two sections, between the, not include the ***s....
Into RGB/K:
*****
iif(b==0,EC=1,EC=0);
iif(b>0,Ds=D*b,Ds=D);
iif(b>0,bs=b,bs=1);
iif(EC==1,q0=exp(-Ds*SP),q0=(1+Ds*SP)^(-1/bs));
iif(EC==1,qWP=2-exp(-Ds*(HP-SP)),qWP=2-(1+Ds*(HP-SP))^(-1/bs));
iif(EC==1,q1=2-2*exp(-Ds*(HP-SP))+exp(-Ds*(2*HP-SP-1)),q1=2-2*(1+Ds*(HP-SP))^(-1/bs)+(1+Ds*(2*HP-SP-1))^(-1/bs));
iif($T<SP,EC*exp(-Ds*(SP-$T))+(1-EC)*(1+Ds*(SP-$T))^(-1/bs)-q0,iif($T>HP,2-EC*(2*exp(-Ds*(HP-SP))+exp(-Ds*(2*HP-$T-SP)))+(1-EC)*(2*(1+Ds*(HP-SP))^(-1/bs)+(1+Ds*(2*HP-$T-SP))^(-1/bs))-q0,2-EC*exp(-Ds*($T-SP))-(1-EC)*(1+Ds*($T-SP))^(-1/bs)-q0))/(q1-q0);
****
& into symbols:
****
D = 1.0;
b =0.5;
SP =0.00;
HP =1.00;
Rnorm;
q0;
qWP;
q1;
Ds;
bs;
EC;
*****
So what does it do?
You may be suprised at what these little equations can do for stretching...
Thanks for sharing. I tried the Pixel Math version (as I couldn't figure out how to load the XPSM file as an icon). But when I applied it to a linear image, it seemed to do very little (see attached - linear on the left, after your process on the right).
And just to prove that my image does contain some actual data, here is an unlinked STF applied to the same file
Hi Stuart
I am just wondering why you are using the PixelMath expressions rather than the script. The latter is much easier to work with! If you are having problems installing the script please let me know and I will be happy to try and help you get up and running.
CS
Mike
|
You cannot like this item. Reason: "ANONYMOUS".
You cannot remove your like from this item.
Editing a post is only allowed within 24 hours after creating it.
You cannot Like this post because the topic is closed.
Adrian Knagg-Baugh:
David Payne:
Götz Golla:
Hello @David Payne and fellow astronomers,
thanks a lot for sharing your formulas and your analysis and graphs about the generalized hyperbolic stretch transformations. This is very helpful for our whole community. Thank you for taking the time !
As a Siril user I often perceive that general concepts of astroprocessing are described with the perspective of a PixInsight user - which is absolutely OK. Beginners may conclude then that the features are only available in PI, or even are inventions of the PI programmers. This is neither the case for the GHS algorithms nor (for example) for star extraction with StarNet and other functions.
Stumbling over this thread after I have used GHS in Siril, I just would like to say that the GHS algorithm is also included in Siril with a very convenient GUI. A highly recommended and valuable addition to the toolbox
Regards,
Goetz
Hi Goetz,
I agree with you, but ultimately it takes a programmer to actually put the algorithm/method into code and create a GUI for it. Thanks to @Mike Cranfield and @Adrian Knagg-Baugh for doing this for Pixinsight and Siril respectively - they are even collaborating on both. I am glad you like the process/script.
Cheers,
Dave
You're too kind, Dave, all I did for Siril was port your and Mike's excellent existing work! @Götz Golla im not sure if you're using the stable 1.0 series of Siril or the git version, but the version in git is more extensive and has a better user interface than the initial version that got backported to 1.0. It'll get a full release in v1.2 when that happens.
@Adrian Knagg-Baugh : Yes, I am using git to get the latest features and fixes - and I do see your contribution to Siril in ght.c |
You cannot like this item. Reason: "ANONYMOUS".
You cannot remove your like from this item.
Editing a post is only allowed within 24 hours after creating it.
You cannot Like this post because the topic is closed.
I really like GHS now I am used to it. It produces really nice results with lots of control.
But I have a question. I always do GHS on the starred image. But someone suggested I should run it on the starless image. The problem then is that the 'stars' image would then be linear so when I return the stars after stretching the starless version they are not bright enough. So I then tried stretching the stars image with GHS but it produces really weird results. For one thing the histo peak is way over to the left even at maximum zoom, so it's hard to place the symmetry point. But then even with a gigantic stretch the stars look very binarized and nothing like actual stars.
So I am not sure how to handle the stars only image to get it in a state to add back in to the starless image.
I never have this problem when I run GHS first and then extract the stars later. The stars seem to look natural in that situation.
|
You cannot like this item. Reason: "ANONYMOUS".
You cannot remove your like from this item.
Editing a post is only allowed within 24 hours after creating it.
You cannot Like this post because the topic is closed.
Stuart Taylor:
So I am not sure how to handle the stars only image to get it in a state to add back in to the starless image.
If I want a starless non-linear image I tend to remove the stars from the linear image. I find the main AI star removal options (I use Star Xterminator) often don't work so well on GHS stretched stars.
To get stretched stars, I duplicate the linear image and remove stars form one of them. Then stretch the star filled image to get the stars I want. Then apply the same stretch to the starless image. Then remove the stars by "unscreening" them from these two stretched images with pixelmath: iif( starless = 1, 0, (1 - (1 - starfull)/(1 - starless))).
|
You cannot like this item. Reason: "ANONYMOUS".
You cannot remove your like from this item.
Editing a post is only allowed within 24 hours after creating it.
You cannot Like this post because the topic is closed.
Mike Cranfield:
Stuart Taylor:
So I am not sure how to handle the stars only image to get it in a state to add back in to the starless image.
If I want a starless non-linear image I tend to remove the stars from the linear image. I find the main AI star removal options (I use Star Xterminator) often don't work so well on GHS stretched stars.
To get stretched stars, I duplicate the linear image and remove stars form one of them. Then stretch the star filled image to get the stars I want. Then apply the same stretch to the starless image. Then remove the stars by "unscreening" them from these two stretched images with pixelmath: iif( starless = 1, 0, (1 - (1 - starfull)/(1 - starless))).
Thanks. I can't say I understand what is being done here, but I just tried it anyway. However, PI gave me an error*** Error: Expected lvalue (variable) operand:
iif( starless = 1, 0, (1 - (1 - starfull)/(1 - starless)))
~~~~~^
|
You cannot like this item. Reason: "ANONYMOUS".
You cannot remove your like from this item.
Editing a post is only allowed within 24 hours after creating it.
You cannot Like this post because the topic is closed.
Stuart Taylor:
Mike Cranfield:
Stuart Taylor:
So I am not sure how to handle the stars only image to get it in a state to add back in to the starless image.
If I want a starless non-linear image I tend to remove the stars from the linear image. I find the main AI star removal options (I use Star Xterminator) often don't work so well on GHS stretched stars.
To get stretched stars, I duplicate the linear image and remove stars form one of them. Then stretch the star filled image to get the stars I want. Then apply the same stretch to the starless image. Then remove the stars by "unscreening" them from these two stretched images with pixelmath: iif( starless = 1, 0, (1 - (1 - starfull)/(1 - starless))).
Thanks. I can't say I understand what is being done here, but I just tried it anyway. However, PI gave me an error*** Error: Expected lvalue (variable) operand:
iif( starless = 1, 0, (1 - (1 - starfull)/(1 - starless)))
~~~~~^
Sorry, I should have made it clearer. You need to replace “starless” with the id of your stretched starless image and replace “starfull” with the id of your stretched image with stars. I hope that is clearer!
(or rename your two stretched images to starless and starfull - that would work too! ;))
To recombine, the simplest approach is simply to screen blend the stars back in - again using PixelMath you would use: 1 - (1 - starsImageId) * (1 - starlessImageId), again replacing with your actual image IDs. There are also more complex recombination approaches discussed elsewhere on this forum.
|
You cannot like this item. Reason: "ANONYMOUS".
You cannot remove your like from this item.
Editing a post is only allowed within 24 hours after creating it.
You cannot Like this post because the topic is closed.
Hi
I just saw this post - I will play with it - absolutely... Thanks a million.
|
You cannot like this item. Reason: "ANONYMOUS".
You cannot remove your like from this item.
Editing a post is only allowed within 24 hours after creating it.
You cannot Like this post because the topic is closed.
Stuart Taylor:
I really like GHS now I am used to it. It produces really nice results with lots of control.
But I have a question. I always do GHS on the starred image. But someone suggested I should run it on the starless image. The problem then is that the 'stars' image would then be linear so when I return the stars after stretching the starless version they are not bright enough. So I then tried stretching the stars image with GHS but it produces really weird results. For one thing the histo peak is way over to the left even at maximum zoom, so it's hard to place the symmetry point. But then even with a gigantic stretch the stars look very binarized and nothing like actual stars.
So I am not sure how to handle the stars only image to get it in a state to add back in to the starless image.
I never have this problem when I run GHS first and then extract the stars later. The stars seem to look natural in that situation.
HI Stuart,
I too have been working on stars, as they are sometimes hit or miss for me. I think they are getting better though, but here is my work process. It is also dealing with the fact that the AI's for star removal sometimes don't recognize GHS stretched stars because the AIs weren't trained on them. So here it is...
On a linear basis, you create/have A) your colour RGB containing the stars, B) a starless luminance (actual or extracted), C) a starless RGB and D) a luminance star mask from the extracted stars.
Then I process all three images....
First I work on B) - starless luminance, since this is the most highly processed image. One of the great things about working with a starless image is that many star artifacts the processes create are avoided. Deconvolution, in particular, works like a charm when you don't have to worry about ringing - and mostly de-ringing is turn off (psf from starred version before star removal, of course). I stretch this with GHS but you can focus more on getting the right look and histogram rather than the stars and then work on non-linear processes - as if you were creating a starless luminance version.
Next C) - here the focus is on background colour. Again do all your colour processing, as long as the end result the overall brightness is the same as the luminance you should be good to go.
At this stage you can LRGB combine to create your colour starless image, call it BC. You can also make some adjustments/lprocesses on this image to "finalize" it.
Next over to A) the starred colour image - this can be RGB or NB, the same as the starless colour image before star extraction, or whatever. You can photometrically calibrate it or not, but the idea here is to focus on stretching the stars to obtain the right colour,shape and brightness, but it is also helpful if you can approximately duplicate the brightness of the background to roughly where you ended up with the LRGB combined image.
Fourthly, I stretch the monochrome extracted star mask (D). I also try and be careful with the keeping the stars not too bright. In answer to your question I do use a small, but non 0 SP - an aggressive b - but avoiding any bifurcation of the mask. Since this was extracted stars, the image should be 0 or very very small where there aren't stars. I try and keep the stars very tight, and smaller or the same size than they are in A).
So to put the stars back in the image, I use Pixelmath to replace the BC image, masked with the star only image D, with the starry image A). At this point you should get a decent rendition. You can apply this replacement more than one if you like - this will make the stars more sharp and less gaussian. You can do your star shrink method using BC as your starless image and A as your starred image. If you don't like what you get, you can try and adjust the star mask stretch and try again. If the stars are smaller in the colour image than in the mask, some of the background can of the starred image can bleed into the starless image when applied (making dark lines around the stars), in which case you can brighten up the background of the starred image to minimize this.
I haven't yet perfected the last part myself, but it the best I have yet to do in adding back the star.s.
Hope this helps and CS!
Dave
|
You cannot like this item. Reason: "ANONYMOUS".
You cannot remove your like from this item.
Editing a post is only allowed within 24 hours after creating it.
You cannot Like this post because the topic is closed.
Mike Cranfield:
Stuart Taylor:
Mike Cranfield:
Stuart Taylor:
So I am not sure how to handle the stars only image to get it in a state to add back in to the starless image.
If I want a starless non-linear image I tend to remove the stars from the linear image. I find the main AI star removal options (I use Star Xterminator) often don't work so well on GHS stretched stars.
To get stretched stars, I duplicate the linear image and remove stars form one of them. Then stretch the star filled image to get the stars I want. Then apply the same stretch to the starless image. Then remove the stars by "unscreening" them from these two stretched images with pixelmath: iif( starless = 1, 0, (1 - (1 - starfull)/(1 - starless))).
Thanks. I can't say I understand what is being done here, but I just tried it anyway. However, PI gave me an error*** Error: Expected lvalue (variable) operand:
iif( starless = 1, 0, (1 - (1 - starfull)/(1 - starless)))
~~~~~^
Sorry, I should have made it clearer. You need to replace “starless” with the id of your stretched starless image and replace “starfull” with the id of your stretched image with stars. I hope that is clearer!
(or rename your two stretched images to starless and starfull - that would work too! ;))
To recombine, the simplest approach is simply to screen blend the stars back in - again using PixelMath you would use: 1 - (1 - starsImageId) * (1 - starlessImageId), again replacing with your actual image IDs. There are also more complex recombination approaches discussed elsewhere on this forum.
No it was clear what you meant. I changed the id's to starfull and starless before running pixel math. This is the error it gave me.
|
You cannot like this item. Reason: "ANONYMOUS".
You cannot remove your like from this item.
Editing a post is only allowed within 24 hours after creating it.
You cannot Like this post because the topic is closed.
Stuart Taylor:
Mike Cranfield:
Stuart Taylor:
Mike Cranfield:
Stuart Taylor:
So I am not sure how to handle the stars only image to get it in a state to add back in to the starless image.
If I want a starless non-linear image I tend to remove the stars from the linear image. I find the main AI star removal options (I use Star Xterminator) often don't work so well on GHS stretched stars.
To get stretched stars, I duplicate the linear image and remove stars form one of them. Then stretch the star filled image to get the stars I want. Then apply the same stretch to the starless image. Then remove the stars by "unscreening" them from these two stretched images with pixelmath: iif( starless = 1, 0, (1 - (1 - starfull)/(1 - starless))).
Thanks. I can't say I understand what is being done here, but I just tried it anyway. However, PI gave me an error*** Error: Expected lvalue (variable) operand:
iif( starless = 1, 0, (1 - (1 - starfull)/(1 - starless)))
~~~~~^
Sorry, I should have made it clearer. You need to replace “starless” with the id of your stretched starless image and replace “starfull” with the id of your stretched image with stars. I hope that is clearer!
(or rename your two stretched images to starless and starfull - that would work too! ;))
To recombine, the simplest approach is simply to screen blend the stars back in - again using PixelMath you would use: 1 - (1 - starsImageId) * (1 - starlessImageId), again replacing with your actual image IDs. There are also more complex recombination approaches discussed elsewhere on this forum.
No it was clear what you meant. I changed the id's to starfull and starless before running pixel math. This is the error it gave me.
Sorry Stuart, there is a typo in the PixelMath, the expression should be: iif( starless == 1, 0, (1 - (1 - starfull)/(1 - starless))).
That will teach me not to submit a post before first cutting and pasting to test!
|
You cannot like this item. Reason: "ANONYMOUS".
You cannot remove your like from this item.
Editing a post is only allowed within 24 hours after creating it.
You cannot Like this post because the topic is closed.
Mike Cranfield:
Sorry Stuart, there is a typo in the PixelMath, the expression should be: iif( starless == 1, 0, (1 - (1 - starfull)/(1 - starless))).
That will teach me not to submit a post before first cutting and pasting to test!
ok, thanks. That worked and produced a new stars only image.
But how is that different to the stars image I usually generate with StarXTerminator? (which I add back in when I am done processing the starless image by simple addition in pixelmath, i.e. starless+stars)
There is clearly some subtlety I am completely missing here.
|
You cannot like this item. Reason: "ANONYMOUS".
You cannot remove your like from this item.
Editing a post is only allowed within 24 hours after creating it.
You cannot Like this post because the topic is closed.
Stuart Taylor:
Mike Cranfield:
Sorry Stuart, there is a typo in the PixelMath, the expression should be: iif( starless == 1, 0, (1 - (1 - starfull)/(1 - starless))).
That will teach me not to submit a post before first cutting and pasting to test!
ok, thanks. That worked and produced a new stars only image.
But how is that different to the stars image I usually generate with StarXTerminator? (which I add back in when I am done processing the starless image by simple addition in pixelmath, i.e. starless+stars)
There is clearly some subtlety I am completely missing here.
It is the same as the star image you would generate from StarXterminator if you check the "Unscreen Stars" option, it is just a handy way to extract the GHS style stars that sometimes don't respond so well to extraction by StarXterminator after being stretched.
Screen blending the stars, in my view, trends to give a more natural result than simple addition. One problem with simple addition is that stars + starless can yield a result that is greater than 1, ie burning out that pixel. The screen blend formula will always be less than or equal to 1 if the component image pixel values are less than or equal to 1, so you don't get this burn out issue.
|
You cannot like this item. Reason: "ANONYMOUS".
You cannot remove your like from this item.
Editing a post is only allowed within 24 hours after creating it.
You cannot Like this post because the topic is closed.
Hi Mike,
It isn't an add, your are substituting the starry image into the starless image (both the stars and the background), only it is masked to accept only the parts that have stars. No chance of a result >1. The pixelmath formula is simply: starfull . If you repeated it a billion times, the maximum pixel value you could make the substitution is the maximum value of starfull.
One could also as star reduction mask and to paste the starless back onto starfull. The star reduction mask can be use to make the stars smaller using the standard star reduction process involving binarizing the initial mask, expanding the star halo, then subtracting it from the initial mask, then the starless image will be back substitued for where the star halos were.
It is essentially the same as your blending formula, only the cooefficient of blending only it is the level of the mask that determines the blend, rather than the pixel value itself. It has the advantage over the blending formula because you can impose RGB stars (and just the stars) onto a narrowband starless image. That is to say, they don't have to be similar at all. You can impose stars from a completely different image if you wanted to . Orion stars on a Cygnus nebulosity. The trick is to get the starmask stretched right. In anyevent - any portion of image 1 replacing image 2 using an image3 mask (all three have pixels values <1) cannot yield a result with invalid pixel values and clipping.
The formula is fine if you extract the stars in non-linear mode, but it assumes that the star is brighter for all colours than the starless image which may not be true if you are blending stars on to a starless image - particularly if they have been stretched differently or shot through different filters!
Hope this helps.
Dave
|
You cannot like this item. Reason: "ANONYMOUS".
You cannot remove your like from this item.
Editing a post is only allowed within 24 hours after creating it.
You cannot Like this post because the topic is closed.
David Payne:
Hi Mike,
It isn't an add, your are substituting the starry image into the starless image (both the stars and the background), only it is masked to accept only the parts that have stars. No chance of a result >1. The pixelmath formula is simply: starfull . If you repeated it a billion times, the maximum pixel value you could make the substitution is the maximum value of starfull.
One could also as star reduction mask and to paste the starless back onto starfull. The star reduction mask can be use to make the stars smaller using the standard star reduction process involving binarizing the initial mask, expanding the star halo, then subtracting it from the initial mask, then the starless image will be back substitued for where the star halos were.
It is essentially the same as your blending formula, only the cooefficient of blending only it is the level of the mask that determines the blend, rather than the pixel value itself. It has the advantage over the blending formula because you can impose RGB stars (and just the stars) onto a narrowband starless image. That is to say, they don't have to be similar at all. You can impose stars from a completely different image if you wanted to . Orion stars on a Cygnus nebulosity. The trick is to get the starmask stretched right. In anyevent - any portion of image 1 replacing image 2 using an image3 mask (all three have pixels values <1) cannot yield a result with invalid pixel values and clipping.
The formula is fine if you extract the stars in non-linear mode, but it assumes that the star is brighter for all colours than the starless image which may not be true if you are blending stars on to a starless image - particularly if they have been stretched differently or shot through different filters!
Hope this helps.
Dave
Hi Dave
I understand your method, but I thought Stuart was questioning the simpler screen blending approach I had suggested and his own approach of simply adding the stars in. At any rate that was what I was commenting on, apologies if that was unclear!
Cheers
Mike
|
You cannot like this item. Reason: "ANONYMOUS".
You cannot remove your like from this item.
Editing a post is only allowed within 24 hours after creating it.
You cannot Like this post because the topic is closed.
No worries, Mike. I didn't mean to imply that the formula method is wrong and it is definitely simpler than the method I put forward. I have just been tuning up my star insertion methodology and looking for a bit of feedback. I like to take out the stars at the linear stage because it makes deconvolution more effective and without ringing artifacts in the stars. I could add the stars back in after deconvolution, stretch the image, and then take them out again for non-linear processing but this doesn't work in many circumstances.
Clear Skies!
Dave
|
You cannot like this item. Reason: "ANONYMOUS".
You cannot remove your like from this item.
Editing a post is only allowed within 24 hours after creating it.
You cannot Like this post because the topic is closed.
Hi guys, sorry to dig up this old post, but I was quite interested by the great work of David and need to insert this work in my program developped in python.
I don't know if it could be of any help but I would like to share my translation of David algorithm to Python.
I test it and it works (as far as I understand the job behind), but if you find any improvement on this code (especially faster way to execute it, it does interest me).
There is also the code for asinh stretch, to compare result.
This program works with BGR color images coded in 8 bytes (each color stack can have a value of 0 to 255).
I use some default values for parameters, you can modify this parameters to change stretch strength.import cv2
import numpy as np
import math
import time
BLUE_N = 0
GREEN_N = 1
RED_N = 2
#Hyperbolic stretch
def stretch_ghs(bgr_frame, b=0.5, D=2.0, SP=0, HP=1):
result = (bgr_frame.astype(np.float32) / 255)
if b == 0:
EC = 1
Ds = D
bs = 1
q0 = exp(-Ds * SP)
qWP = 2 - exp(-Ds * (HP - SP))
q1 = 2 - 2 * exp(-Ds * (HP - SP)) + exp(-Ds * (2 * HP - SP - 1))
else:
EC = 0
Ds = D * b
bs = b
q0 = (1 + Ds * SP) ** (-1 / bs)
qWP = 2 - (1 + Ds * (HP - SP)) ** (-1 / bs)
q1 = 2 - 2 * (1 + Ds * (HP - SP)) ** (-1 / bs) + (1 + Ds * (2 * HP - SP - 1)) ** (-1 / bs)
result = np.where(result < SP, EC * np.exp(-Ds * (SP - result)) + (1 - EC) * (1 + Ds * (SP - result)) ** (-1 / bs) - q0,
np.where(result > HP, 2 - EC * (2 * np.exp(-Ds * (HP - SP)) + np.exp(-Ds * (2 * HP - result - SP))) + (1 - EC) * (2 * (1 + Ds * (HP - SP)) ** (-1 / bs) + (1 + Ds * (2 * HP - result - SP)) ** (-1 / bs)) - q0,
2 - EC * np.exp(-Ds * (result - SP)) - (1 - EC) * (1 + Ds * (result - SP)) ** (-1 / bs) - q0))
result = (result * 255) / (q1 - q0)
return result.clip(0, 255).astype(np.uint8)
#Stretch ASIN
def stretch_asinh(rgb_frame, beta = 2.0, offset = 5.0):
red_ratio = 0.2126
green_ratio = 0.7152
blue_ratio = 0.0722
asinh_beta = math.asinh(beta)
total_mean = np.mean(rgb_frame, axis=(0,1)) / 255
x = red_ratio * total_mean[RED_N] + green_ratio * total_mean[GREEN_N] + blue_ratio * total_mean[BLUE_N]
k = math.asinh(beta * x) / (x * asinh_beta)
rgb_frame_short = ((rgb_frame.copy().astype(np.short) - offset) * k).clip(0, 255)
return rgb_frame_short.astype(np.uint8)
#MAIN
if __name__ == "__main__":
ref_frame = cv2.imread("test.png")
ghs_frame = stretch_ghs(ref_frame)
asin_frame = stretch_asinh(ref_frame)
cv2.imshow("ref img", ref_frame)
cv2.imshow("ghs frame", ghs_frame)
cv2.imshow("asin frame", asin_frame)
cv2.waitKey()
|
You cannot like this item. Reason: "ANONYMOUS".
You cannot remove your like from this item.
Editing a post is only allowed within 24 hours after creating it.
You cannot Like this post because the topic is closed.
Hi Watchover,
Thanks for the compliments, but I do need to clarify a couple of things. (sorry about the math speak)...
1) The original formation I reported on, with additional testing, proved a little to awkward to use (it has two inflection/symmetry points). This formulation was done after this orginal posting, but before the coding of the Pixinsight (and Siril) code. The re-formulated equations have the same base function but uses linear forms to protect the shadows and highlights. This somewhat different formulation can be found in the documentation that can be found with the Pixinsight documentation. I won't repeat it here, for fear of making a typo, but here is a segment from the documentation. A little bit of calculus provides the linear slopes (first derivatives) of the linear sections that match the transform at LP and HP.

2) Mike Cranfield, who did the vast majority of the actual coding, found a good way to speed up the code. He grouped the complex functions (logarithms exponentials, powers to real numbers) for the constants "b, D, SP, LP,HP" into new coefficients that didn't need recalculating for each pixel. This sped up the calculations greatly. This code is available in the Java script and I believe somewhere in the Siril code as well (I think the Siril code is open sourced).
Of course, coding into a compiled language such as C++ will make the code run much faster than an interpreted language such as Java or Python.
None of this means that your code won't work and will likely be plenty quick for the 8 bit images you are targeting. Thanks for providing the code, I am sure that some, more computer savvy than I, will find useful.
Cheers,
Dave
|
You cannot like this item. Reason: "ANONYMOUS".
You cannot remove your like from this item.
Editing a post is only allowed within 24 hours after creating it.
You cannot Like this post because the topic is closed.
David Payne:
He grouped the complex functions (logarithms exponentials, powers to real numbers) for the constants "b, D, SP, LP,HP" into new coefficients that didn't need recalculating for each pixel.
I will dig into this to try to optimize the python, but it is also the reason why I share it for better coding guys to find a solution and also share it. Python is wide spread in scientific community.
|
You cannot like this item. Reason: "ANONYMOUS".
You cannot remove your like from this item.
Editing a post is only allowed within 24 hours after creating it.
You cannot Like this post because the topic is closed.
David Payne:
interpreted language such as Java or Python
Yes and no, not the purpose here but python is based on large C and C++ code that are called directly from Python program. Which make him as fast as C and C++
|
You cannot like this item. Reason: "ANONYMOUS".
You cannot remove your like from this item.
Editing a post is only allowed within 24 hours after creating it.
You cannot Like this post because the topic is closed.
|
Numba and numexpr are two packages that can help speeding things up in python and numpy. Python is wide-spread nowadays and is the ideal language for prototyping thanks to its vast ecosystem and jupyter lab/jupyter notebooks! Thanks for sharing your code!
|
You cannot like this item. Reason: "ANONYMOUS".
You cannot remove your like from this item.
Editing a post is only allowed within 24 hours after creating it.
You cannot Like this post because the topic is closed.
David Payne:
He grouped the complex functions (logarithms exponentials, powers to real numbers) for the constants "b, D, SP, LP,HP" into new coefficients that didn't need recalculating for each pixel.
I will dig into this to try to optimize the python, but it is also the reason why I share it for better coding guys to find a solution and also share it. Python is wide spread in scientific community.
I have read the great code and work of Mike Cranfield and translate it into Python code.
I confirm it is by far faster that my initial Python code above. I will not post it here because it is a bit long, but if someone is interested you can contact me, I will be glad to share this code.
Thanks for your kind comments and I'm glad you have found the code useful. I'm sure others will find your Python version helpful as well.
CS, Mike
|
You cannot like this item. Reason: "ANONYMOUS".
You cannot remove your like from this item.
Editing a post is only allowed within 24 hours after creating it.
You cannot Like this post because the topic is closed.
to create to post a reply.